Only people that you have invited into your circle can join you in your CircleSpace™️. Using their personal join links, your circle members can enter the CircleSpace™️ at any time, for example to check in with each other between sessions. The easiest way to share details of an upcoming session with your circle members, including their personal join links, is straight from your My.Circles dashboard.
STEP 1: Send invites for your first Circles session
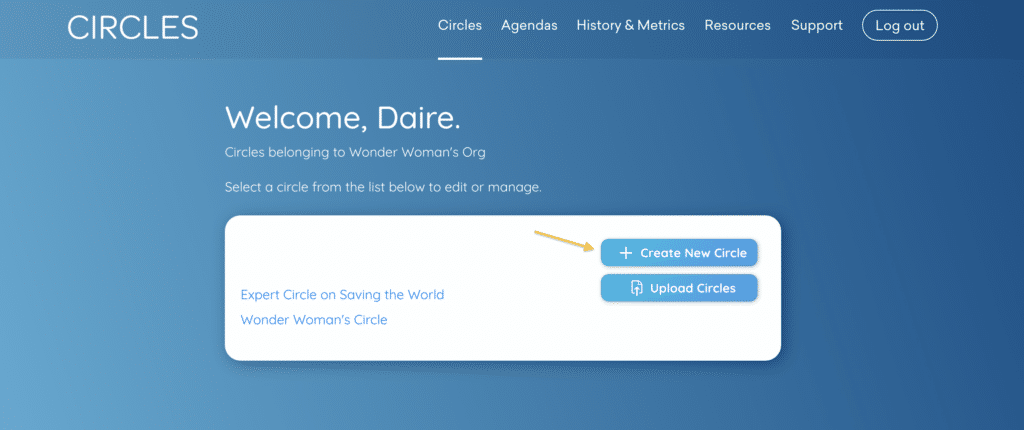
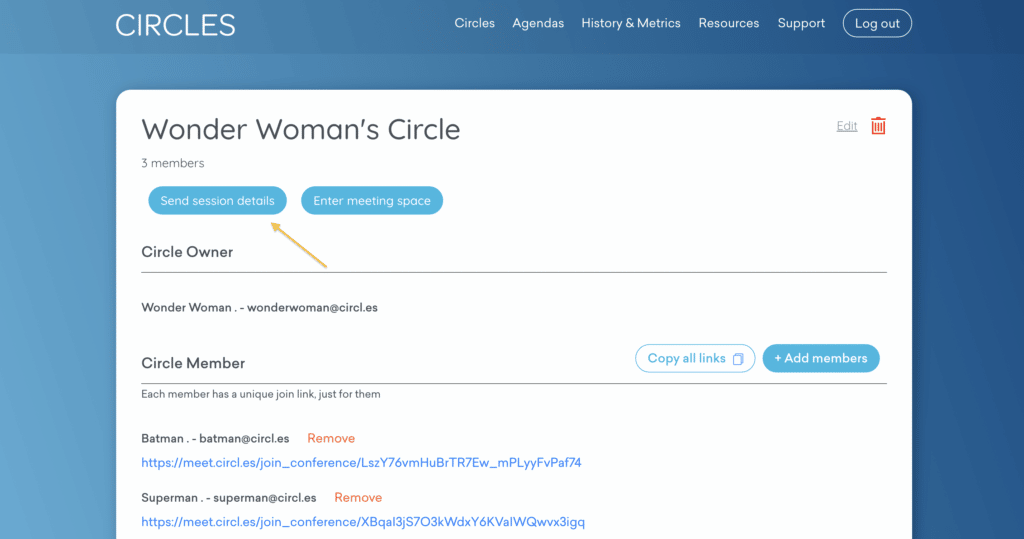
- Go to your My.Circles dashboard by logging in at my.circl.es, then navigate to your circle by clicking ‘Circles’ in the top menu. Once there, select the circle for which you want to schedule a session.
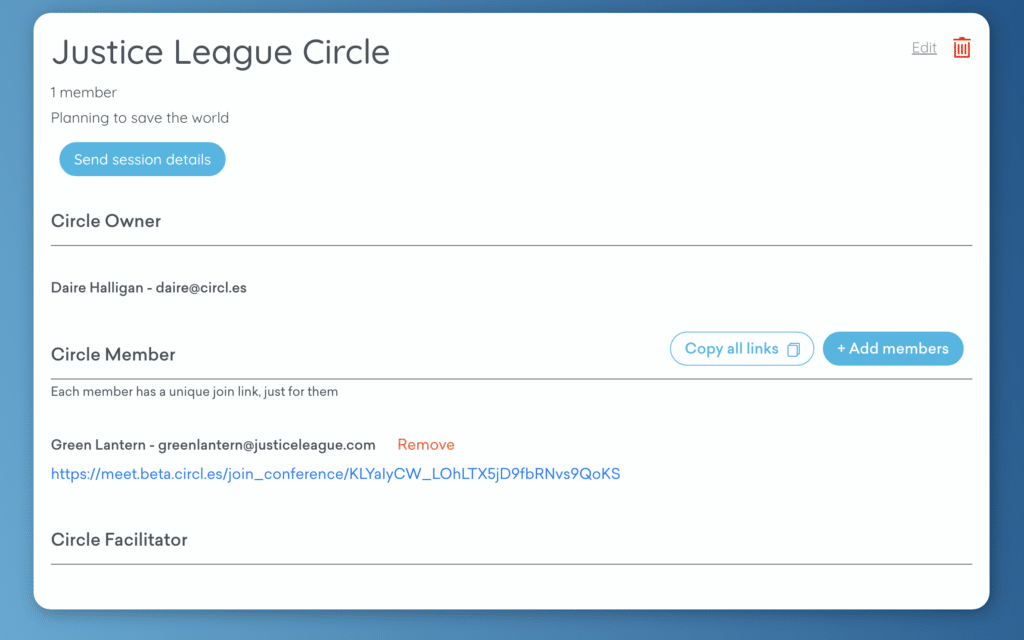
- Select “Send session details” on top of your circle’s overview.
- In the window that opens, select the date, time and duration of your session. Then, add a message about its purpose.
- Select which of your members you want to invite by ticking or unticking the box next to their name.
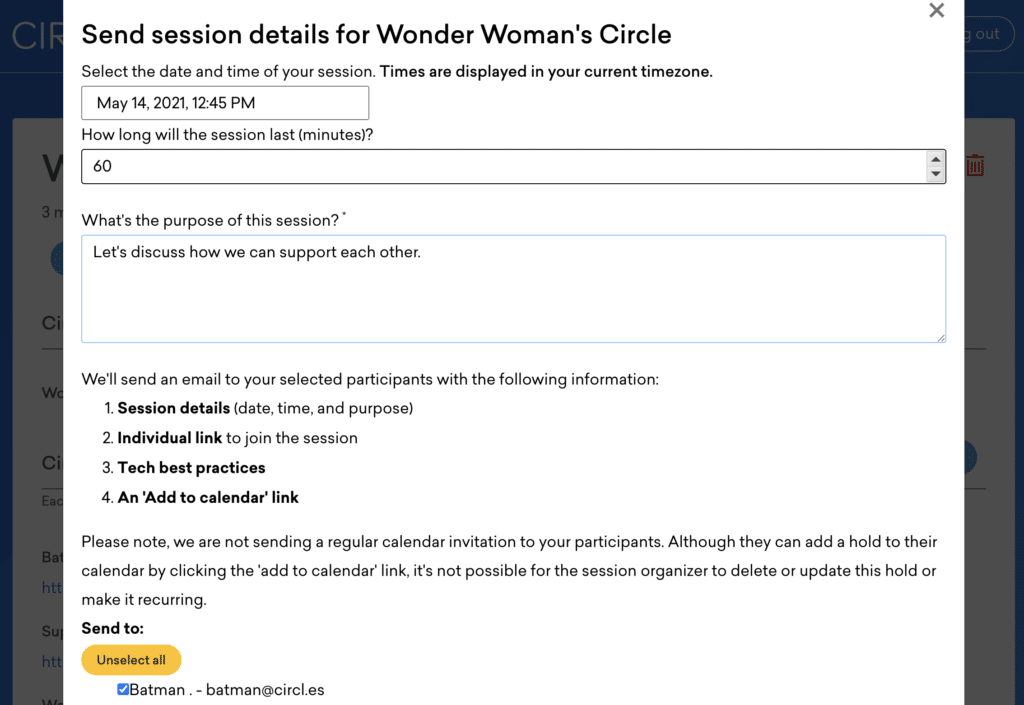
- Click “Submit” to to send an email to your selected participants that includes the following information:
- Session details (date, time, and purpose)
- Individual link to join the session
- Tech best practices
- An ‘Add to calendar’ link
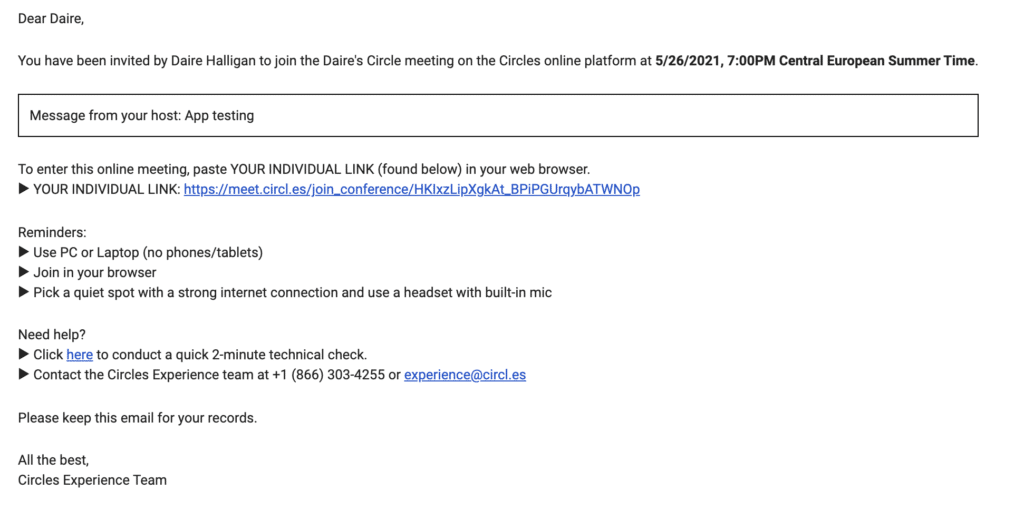
- Here is an example of the email that the participants will receive:
STEP 2: Enter your Circles meeting space
- Select “Enter meeting space” in your circle or click on your personal join link under your name on the list of circle members.

NOTE: For the best experience we always recommend entering the CircleSpace™️ on a laptop or desktop – no mobile phones.
Before your first Circles session, learn more about the features of the CircleSpace™️ and check out our quickstart guide for facilitators.
