How Can We Help?
Quickstart Circles Session Facilitator
Are you the facilitator for your Circles session and not sure where to begin? Don’t worry, the CirclesSpace™️ will help you! Read on for some handy guidelines on how to get started!
In this article you will learn how to use the CircleSpace™️ to run your sessions:
STEP 1: Start your session
STEP 2: Use the agenda
STEP 3: Use the video stream features
STEP 4: Use the text box
STEP 1: Start your session
We recommend that you come to the CircleSpace™️ in advance of your session to familiarize yourself with the features of the CircleSpace™️ and to get ready to start:
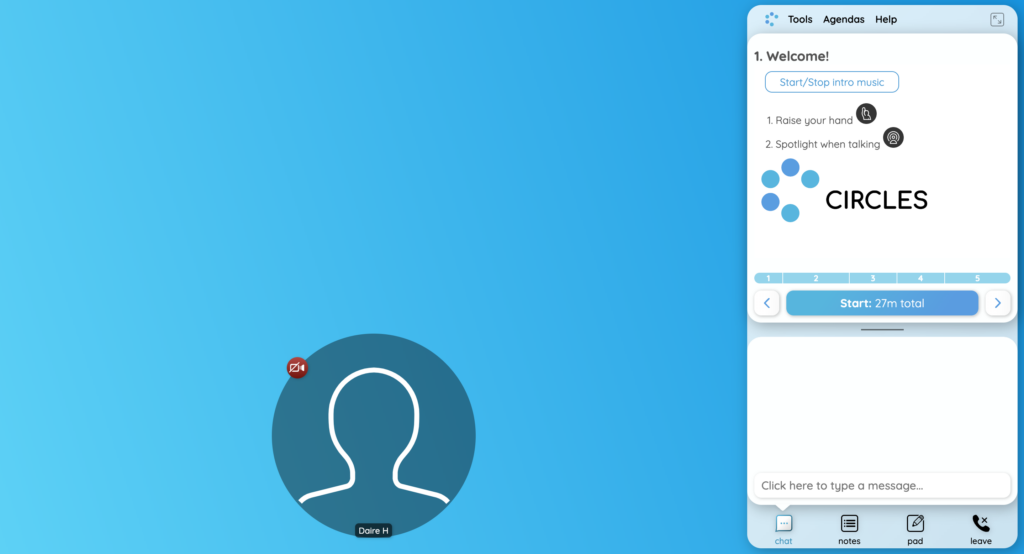
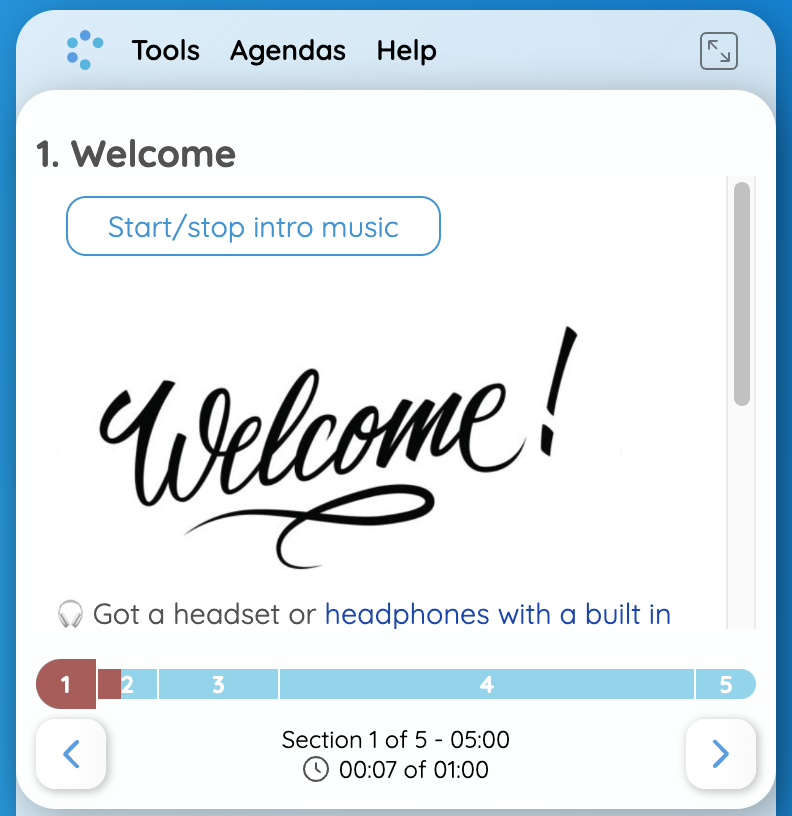
- After entering the meeting, you will see a blue background and your agenda and text box on the right side of your browser window. In the picture below, you see the agenda “Saving the World” loaded.
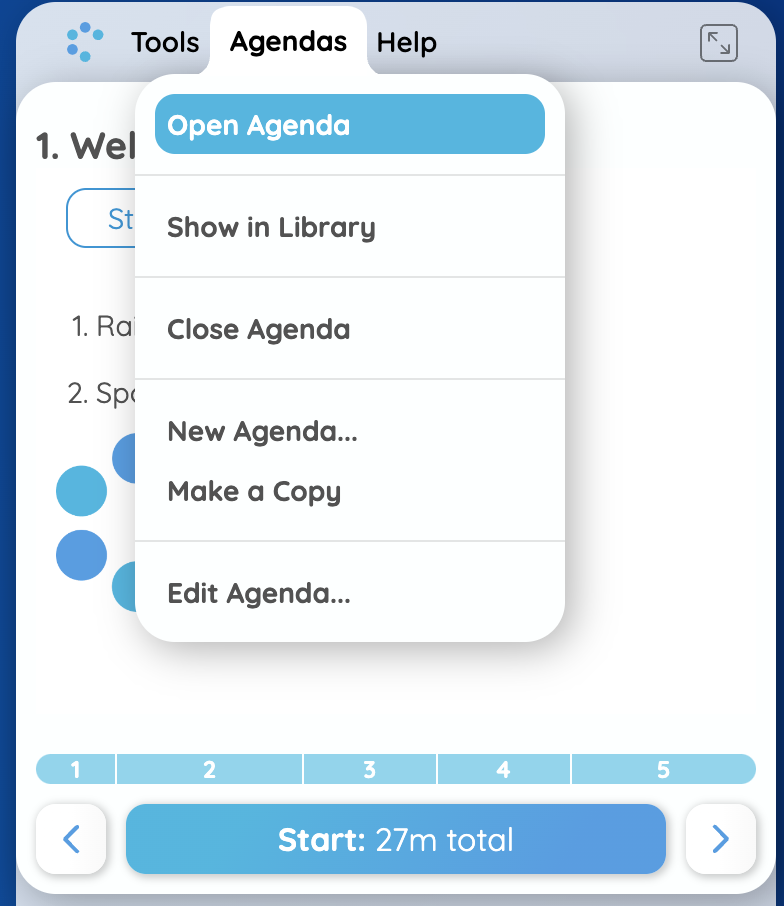
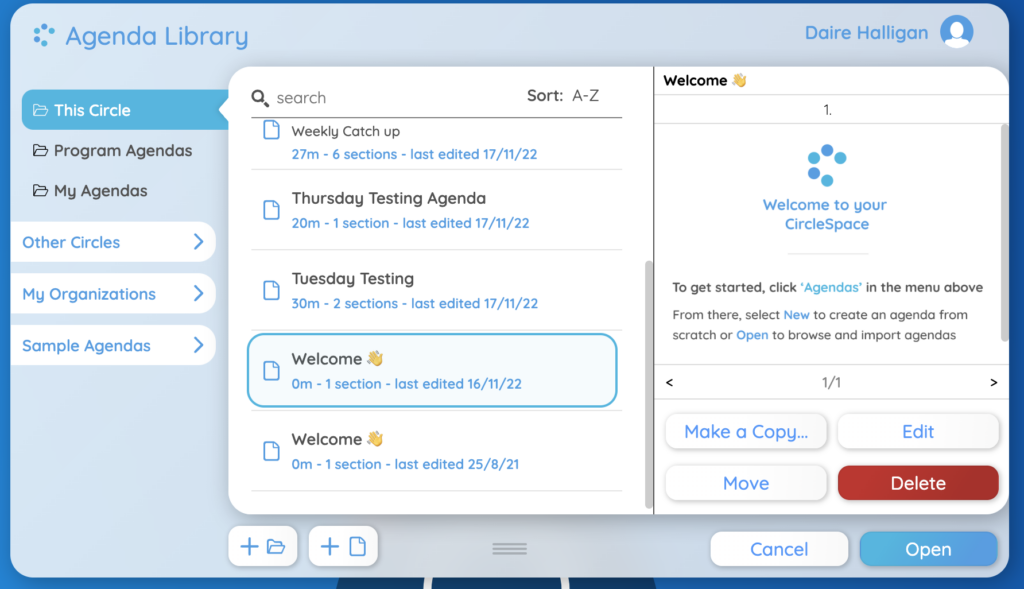
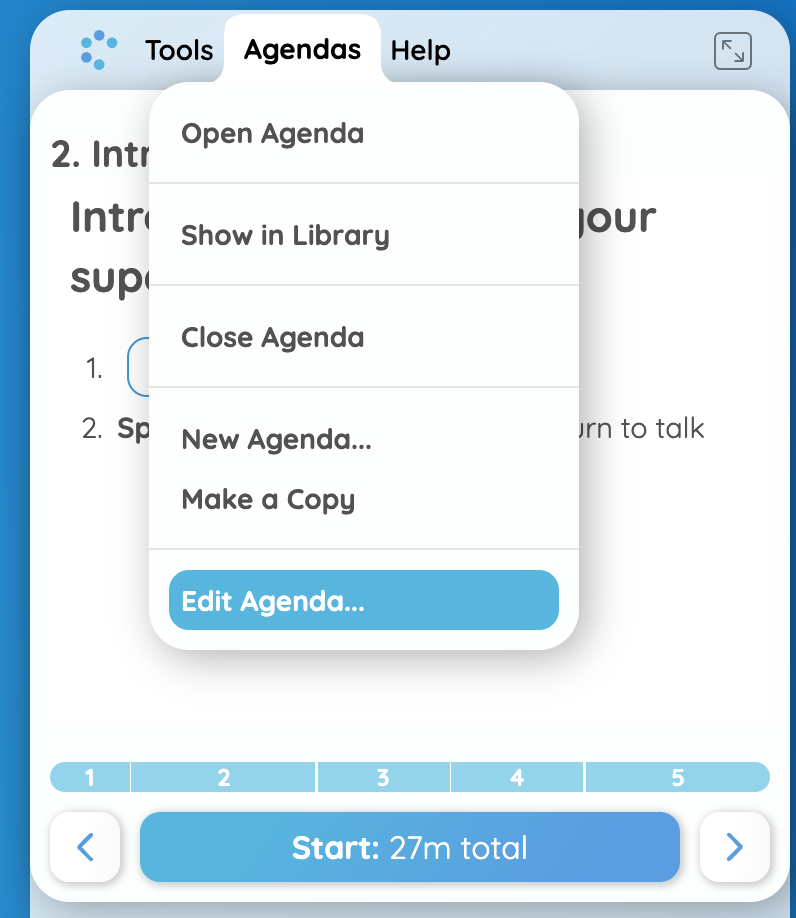
- In case you need to open an agenda, select ‘Agendas’ in the header at the top of the agenda. Then select ‘Open…‘ in the menu that pops up. This will bring up your agenda browser.
NOTE: In your agenda browser you can access all of your agendas: You will immediately see the agendas of the circle you are in, the Program Agendas folder (agendas that will appear in the CircleSpace if there is no agenda open) and the Sample Agendas folder, which contains agendas available to everyone on themes like challenge exploration or team gelling.
To access agendas from other circles or organizations, you’ll need to log in using your my.circl.es credentials through the Log In button on the top right.
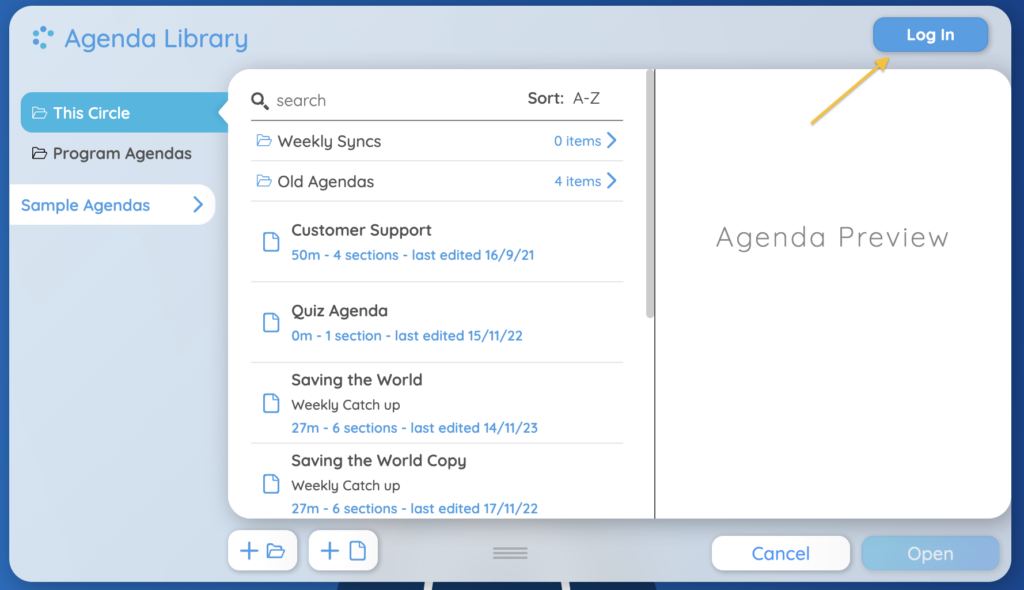
- Click on an agenda to preview it and use the arrows to flip through the pages. Select ‘Open‘ on the bottom right of the agenda browser to load the agenda for your current session into the Circles Space.
NOTE: You can also edit your agenda. Read more about it in how to edit your agenda here.
- To view the table of contents of your agenda, navigate all the way to the left of the agenda by using the left arrow in the progress bar.
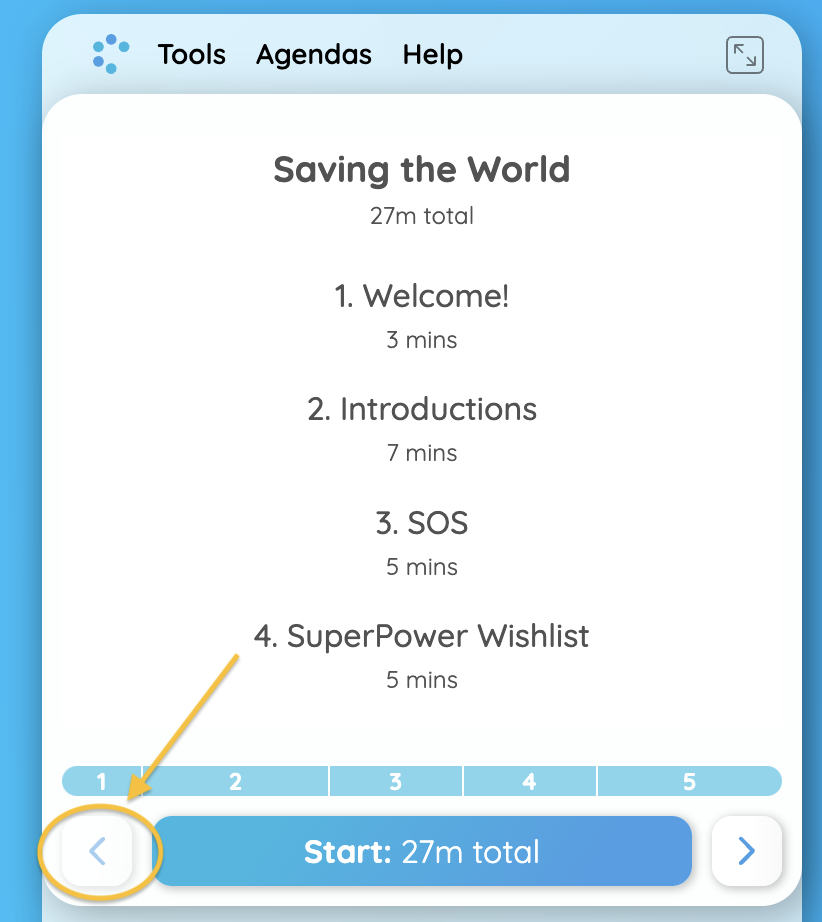
- When you and your participants are ready, click the blue ‘Start‘ button to begin the session. A window will pop up and allow you to indicate whether your session is starting ‘on time’, ‘early’ or ‘late’.
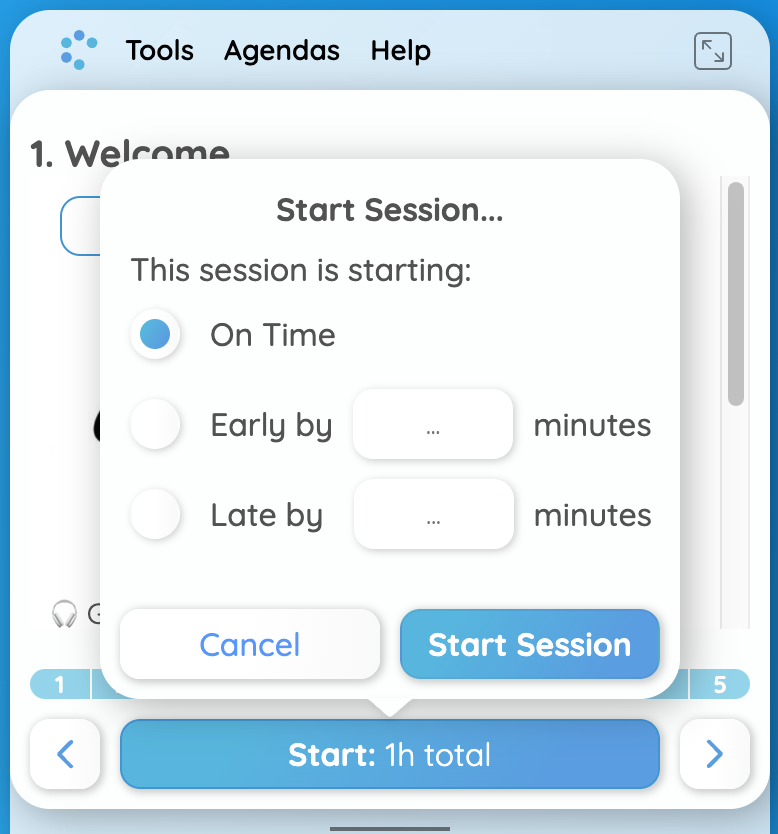
TIP: If you don’t start on time, indicate how many minutes early or late you are starting, so the progress bar is accurate in your session. This way, you can easily see if you are late or early in a particular section of your agenda.
STEP 2: Use the agenda
- The progress bar guides you through the sections of the agenda. Click the arrow below it to navigate to the next section.
NOTE: In the picture on the left, you can see that hovering your mouse over a section on the progress bar, you will see its time indication. If you are behind schedule, the progress bar turns red. The dark hue of blue shows where you are with regards to timing and a slightly lighter blue indicates which agenda section you are in.
- In the agenda, you can find buttons that trigger different functions in the room when you (or someone else) click them. Here are two examples:
- Music buttons start playing music for all participants. Each participant can adjust their own music volume by moving the lever up or down, and the timer above shows how long the music has been playing. Stop the music by clicking the button again. You can also control the music from the gray media tray below the agenda.
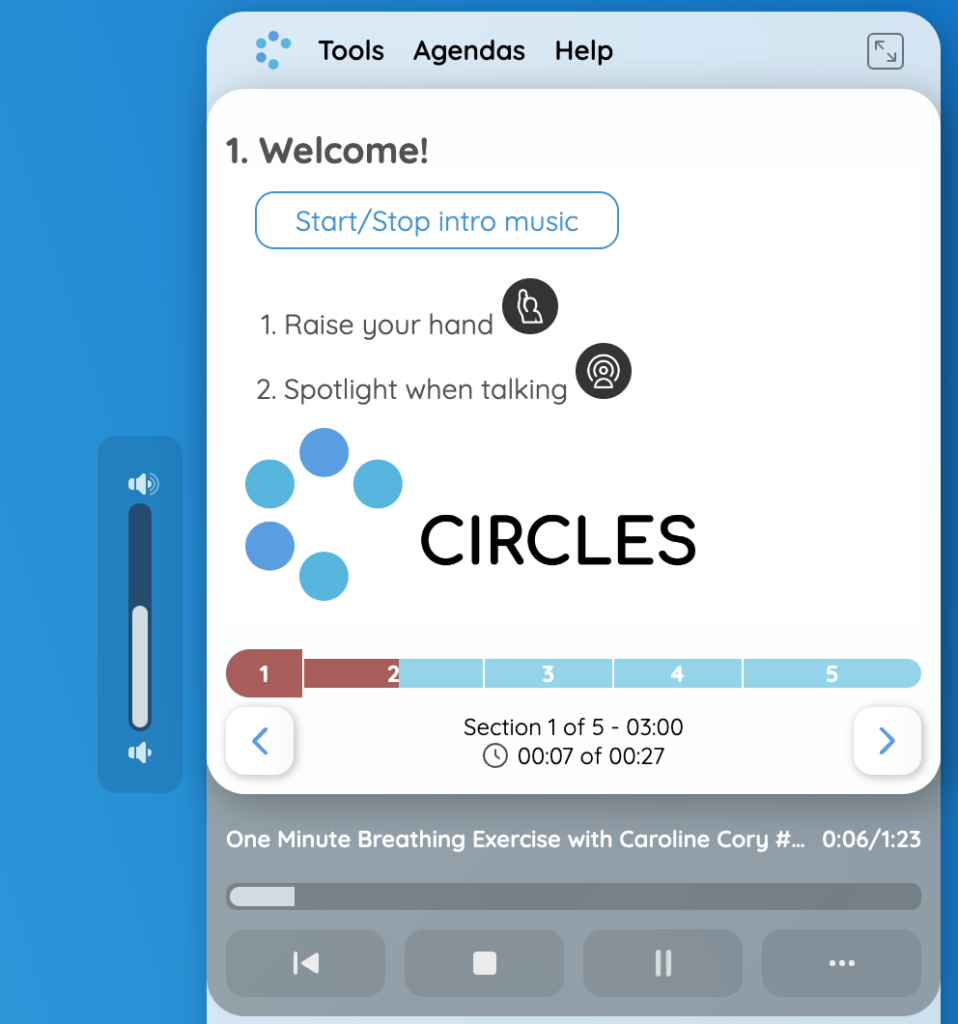
- Random order assigns a number to each person’s video stream to determine who speaks first, second, third and so forth.
- To learn more about agenda buttons, read on here.
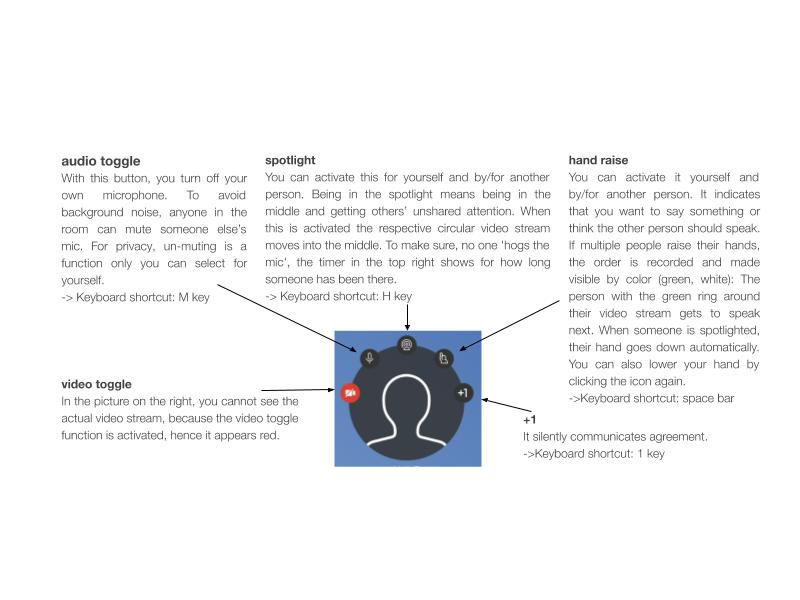
TIP: Hover your cursor over their video stream and click the top middle symbol to “spotlight” each participant. This clears their assigned number and activates the timer in the top right corner to make sure they stay within their time limit.
NOTE: If you do not need your agenda, you can also hide it. To do this, go to the header of the agenda menu and select ‘Tools‘, this then opens up the control panel. Then select ‘Hide agenda‘ from the options shown.
STEP 3: Use your video stream features
When moving your mouse over your own video steam you can find the following five funtions:
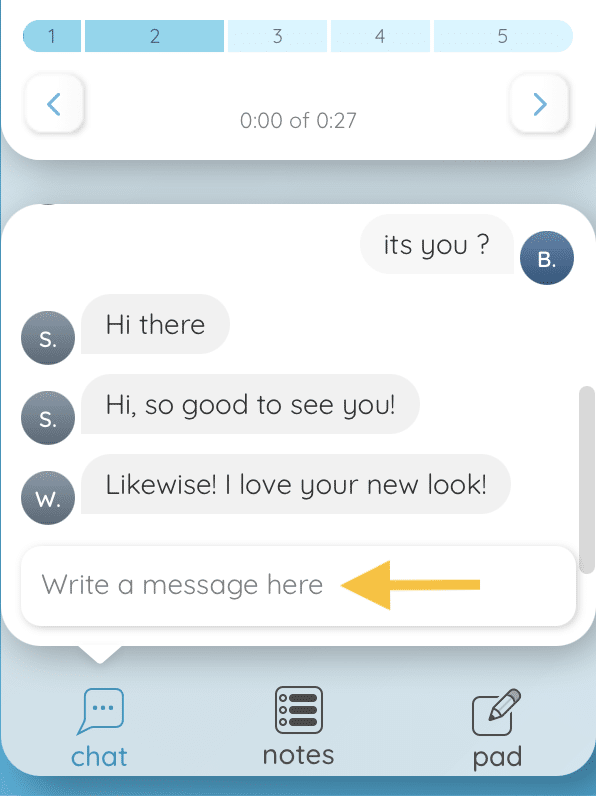
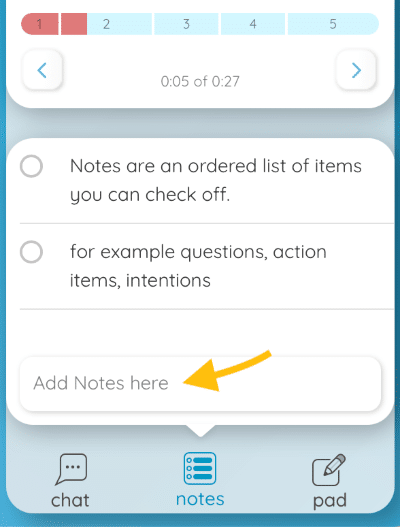
STEP 4: Use the text box
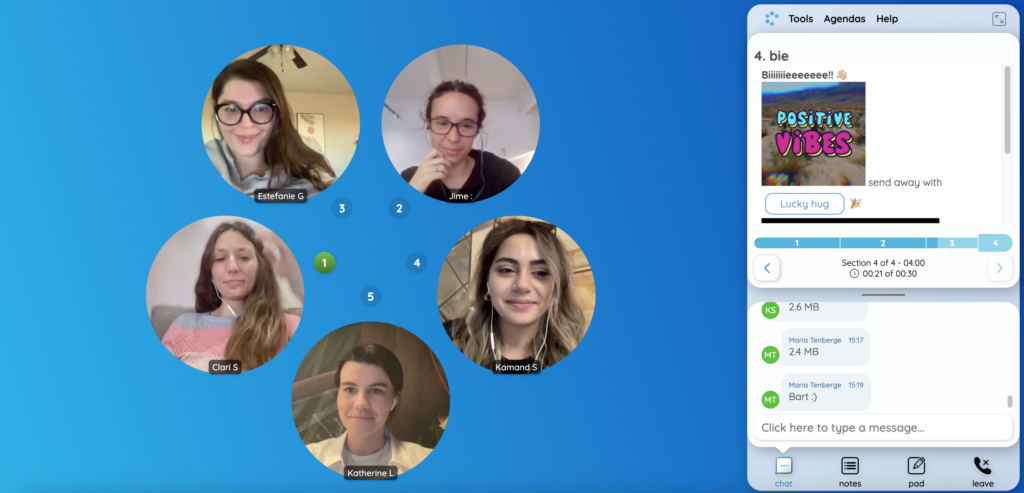
There is a text box in the bottom righthand corner of your CircleSpace™️. By selecting one of the three sections, you can switch between its functions.
Each of the functions help you run your sessions:
- Chat – anything typed here is shared with all people in a Circle. Under ‘Advanced‘ in the lefthand side menu, it can even be downloaded for later reference.
- Notes – can be reordered, deleted or marked as completed while the Circle is in session. They are saved in the Circles space until deleted. An overview can be brought into the room through a button in the agenda. Read more about the Notes feature here.
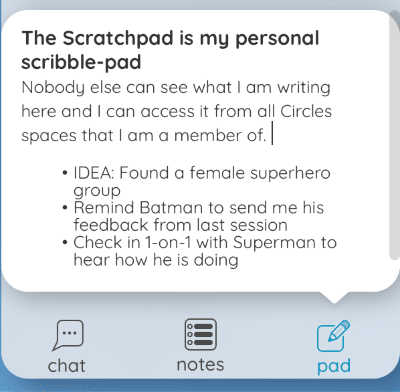
3. Pad – your personal scribble-pad and only visible to you during your Circle session.