In this guide we’ll show you how to get started with Circles by creating a Circle and adding members. A Circle is a group of people that has its own CircleSpace™️, and each of the members has a personal join link that works like a password for the interactive video space.
STEP 1: Creating a Circle
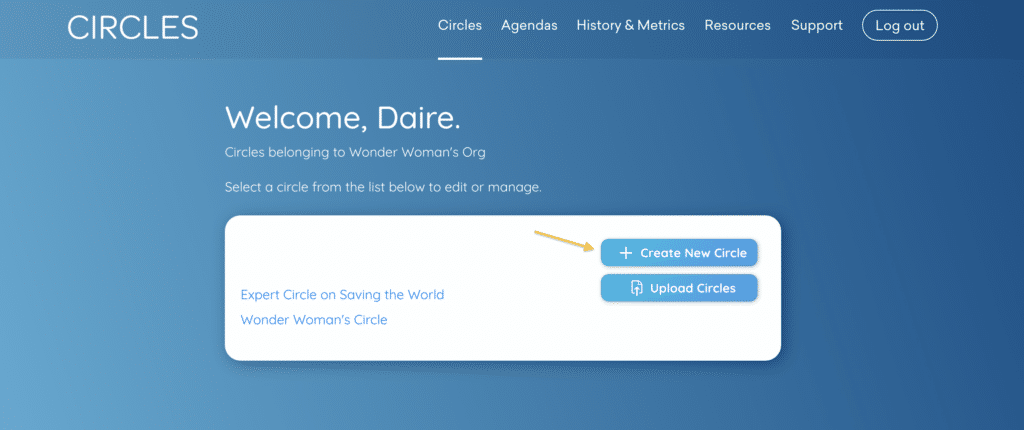
- Go to your My.Circles dashboard by logging in at my.circl.es , and click “Circles” in the top menu to access your list of Circles.
- Click the blue “Create a new circle” button to the right of the list of Circles to create a new one.

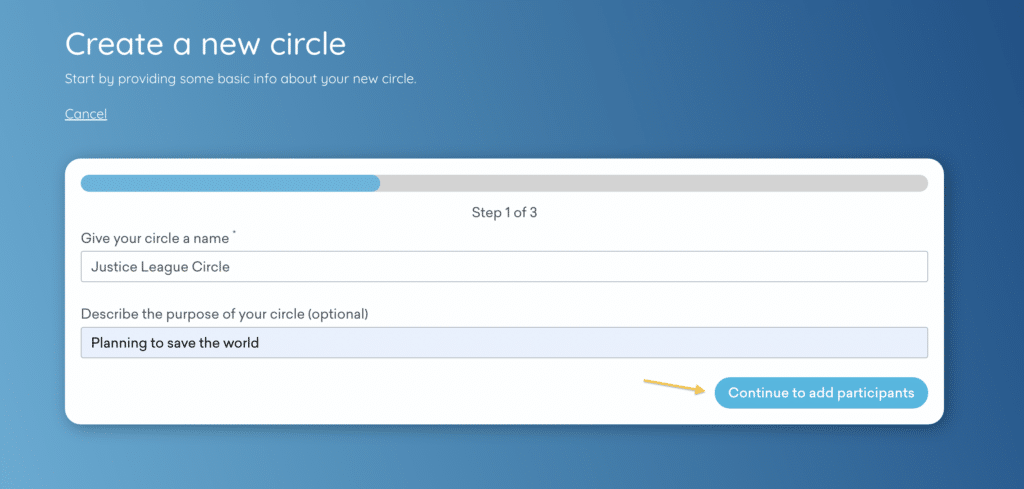
- Enter a name for your new Circle, and an optional description if you wish. Then click “Continue to add participants” to add members to the Circle.

STEP 2: Add Members to the Circle
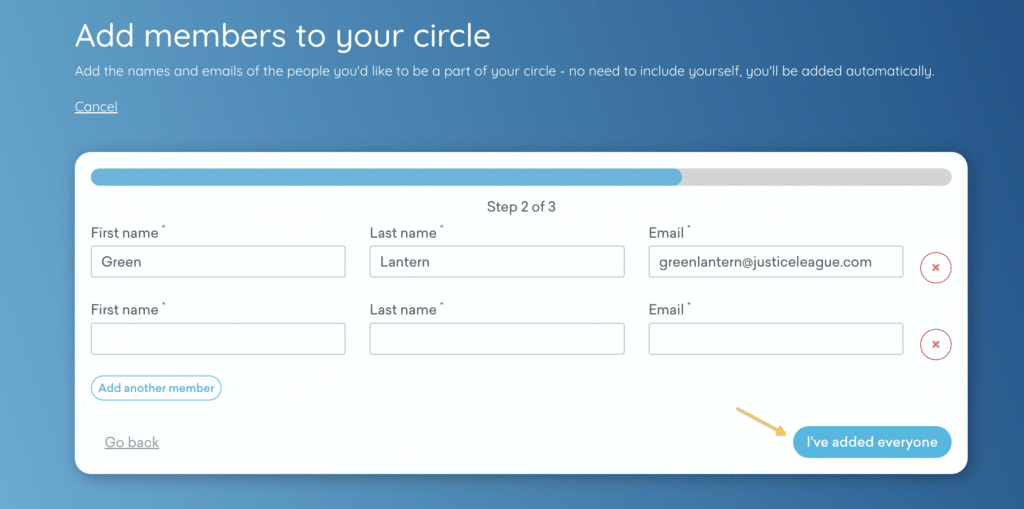
- Add the first name, last name and email address of the person you want to add.
- Click “Add another member” to add multiple people at the same time. When done, click “I’ve added everyone” and then “Finish” on the following page.

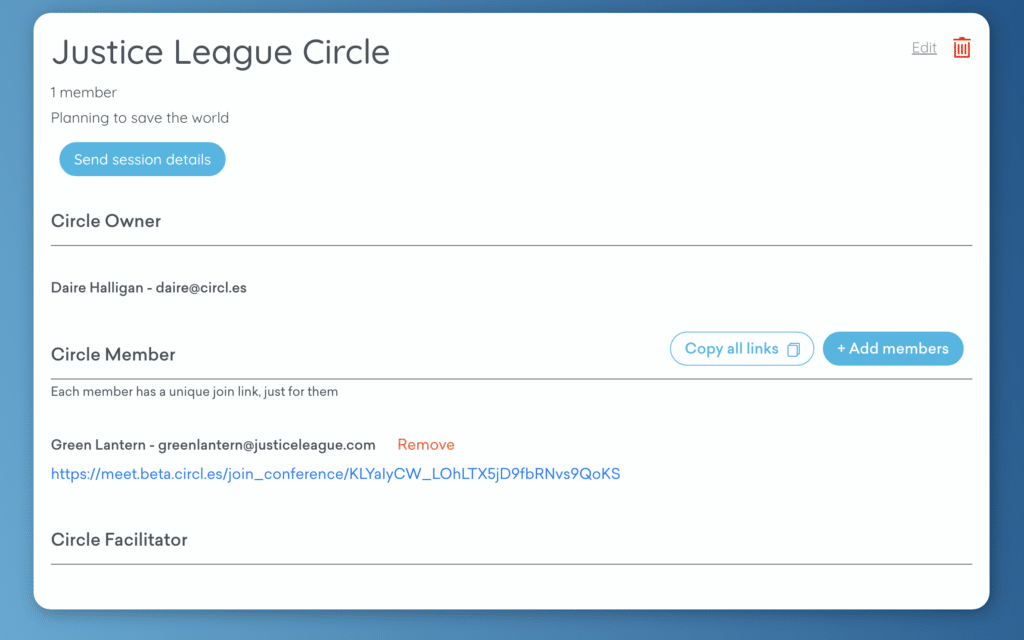
- The new members now show up on your Circle overview.
