How Can We Help?
Notes Feature
When we have meetings in a real room together, we often pull out a piece of paper or start noting down lists on a whiteboard. Using Circles you can easily do so, too. On top of being able to quickly jot down thoughts, ideas, intentions, plans or to dos, the Notes feature helps you to keep track of them. Here’s how you can use the feature:
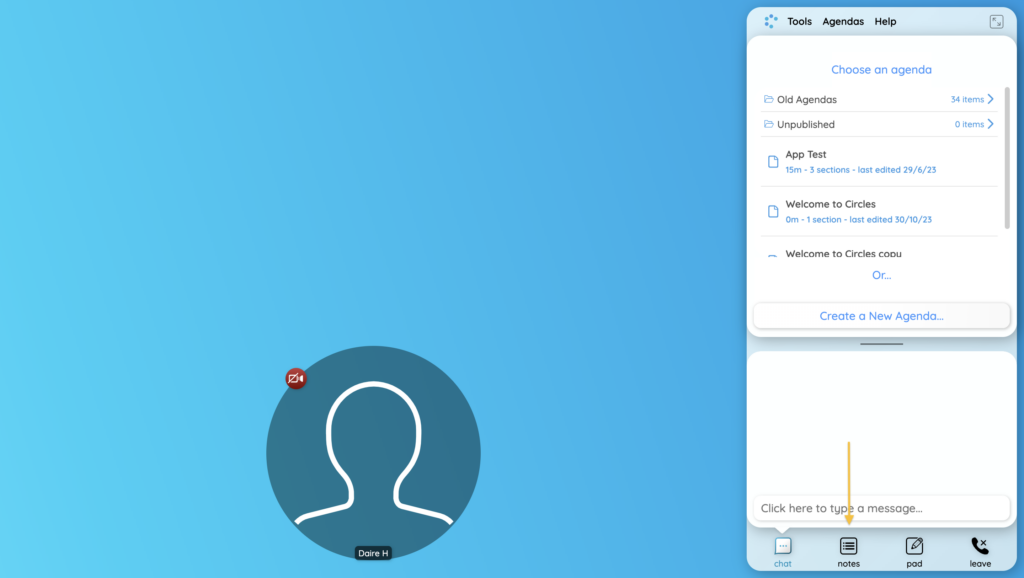
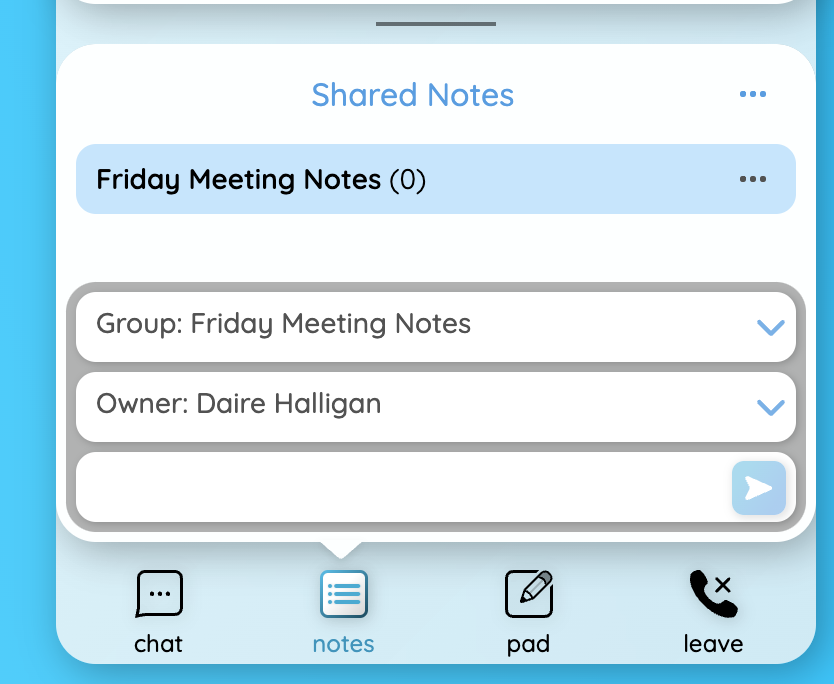
The Notes feature lives in the text box in the bottom right of your CircleSpace™️. Each circle participant can open it at any time by clicking on the ‘Notes‘ icon.
Note Groups
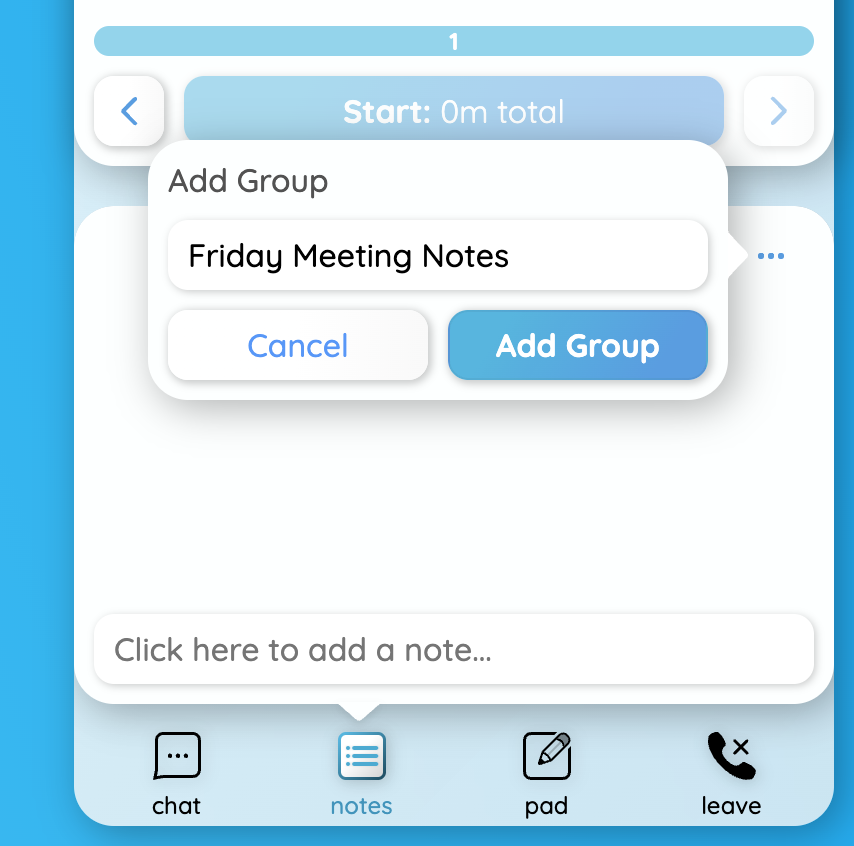
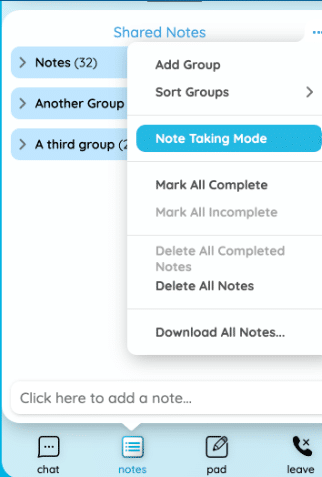
- To keep track of your notes, we recommend using Groups. Click the three blue dots at the top of the notes section and selecting ‘Add Group’.

- Give your group a name by typing into the box that appears and click ‘Add Group’ to confirm. You could create Groups, for example, for particular meetings, or particular purposes, like (“To be discussed later”, “Urgent topics”, “Backlog” etc.).
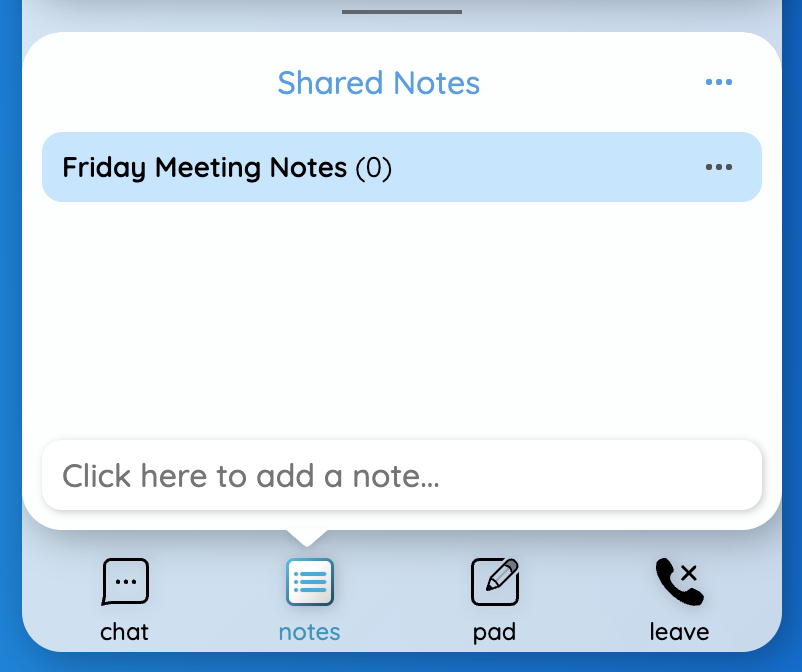
- You’ll now see your new group in the list along with the number of notes contained within the group.
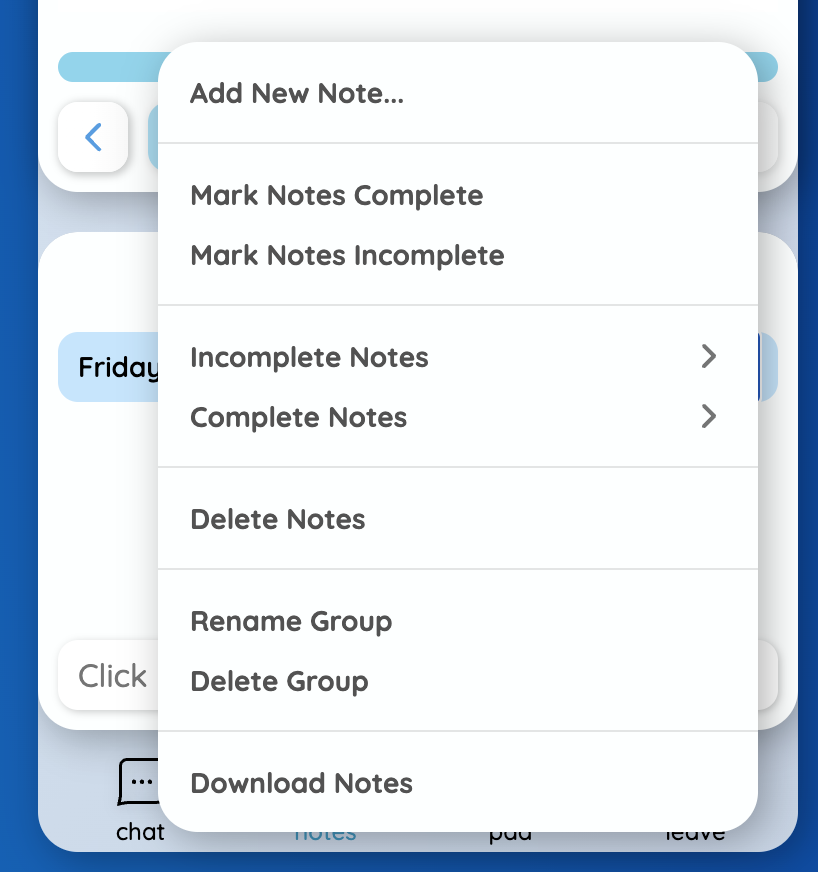
- Click the three black dots next to the group name to bring up the notes menu. From here you can:
- Add notes
- Mark notes complete or incomplete
- Delete notes
- Rename or delete the group
- Download notes
- Within the ‘Incomplete Notes’ and ‘Complete Notes’ sections you have the option to:
- Mark a complete or incomplete
- Change the owner of the note
- Change the group of the note
- Delete
Adding and Completing Notes
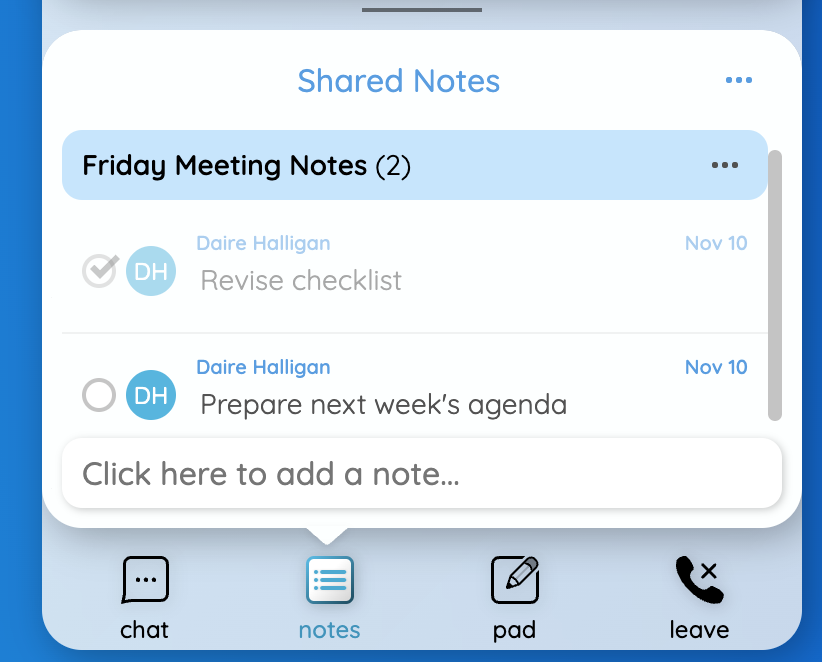
Click in the box at the bottom to add a new note. By default, the note will go to your last edited notes group and assign you as the owner. You can use the drop-down menus to reassign the group or the owner of the note.
To mark a note as complete, click in the circle to the left of the note’s title, and you will see a tick appear to mark it as complete. This note will disappear before your next session.
Note Taking Mode
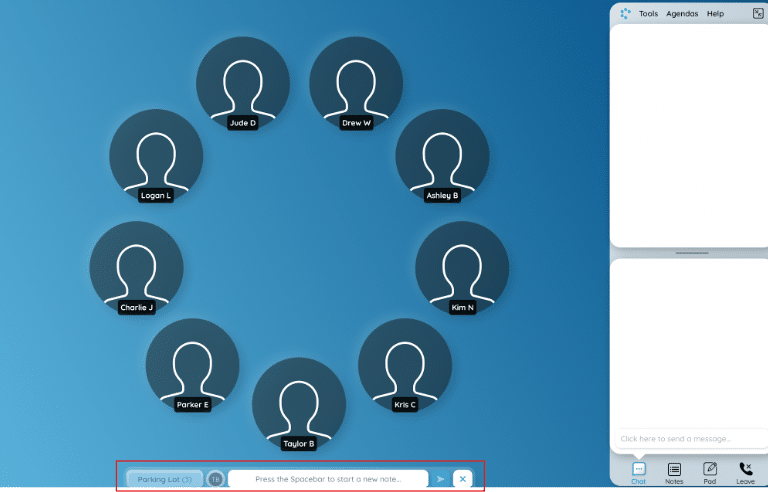
Note Taking Mode is a feature designed to make it easy to take notes during live conversation. By reducing note taking to a 0-click process, conversations can now have a seemless flow, but still gather relevant information.
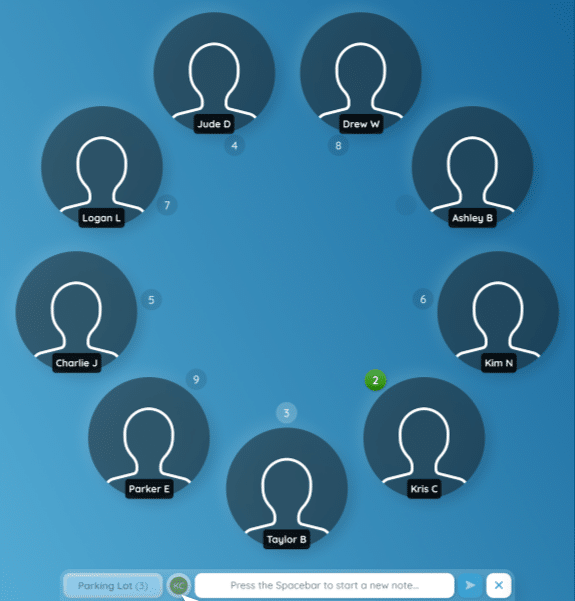
When turned on, this mode lets you start entering notes by tapping the Spacebar, and automatically assigns it to the user with the current random order, the current spotlit user, or the user with the “hand up” icon in that order.
Just tap Space, type the note, hit Enter and you’re done, ready for a new note!
Let’s have a close look at it!
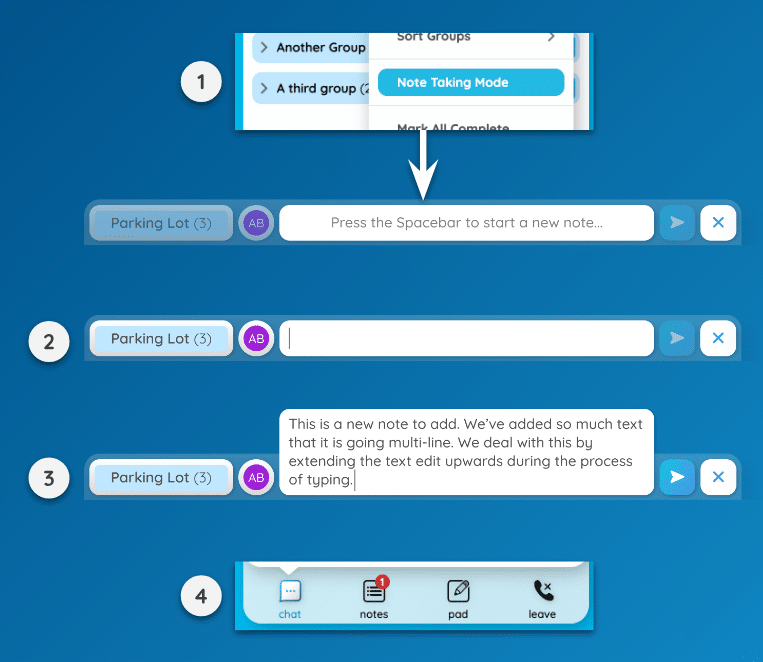
- Activating Note Taking Mode
Note Taking Mode can be turned on or off using this option in the main Notes menu.
- Default Appearance
Note Taking Mode adds the “Note Taker” widget to the bottom of your screen. It remains visible until you turn Note Taking Mode off, which you can do in the Notes menu or by clicking the X button.
- Controls
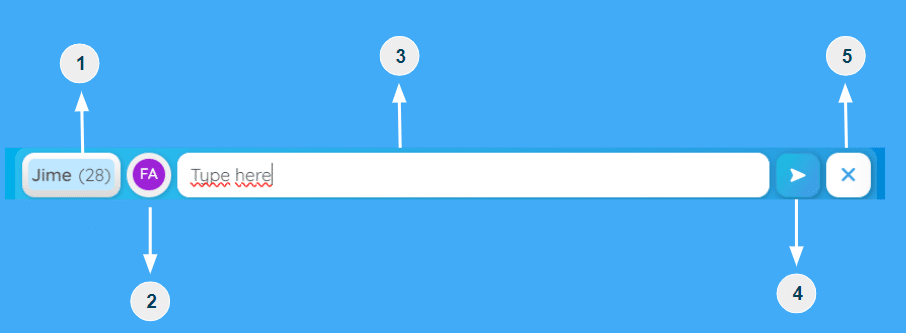
- Group Select: click this for a list of Note Groups. This will remain selected until you change it, so you can set it at the start of a Round and all Notes will go to the same place.
- User Select: the Note Taker sets the current user automatically when you start a new note (see later) but if you click this you can then click on a user’s video circle to assign your new note to them instead before you submit it.
- Note Entry: this is where you type your note.
- Submit: click this or press Enter to submit the new note.
- Close: turns off Note Taking Mode. You do not need to do this between taking notes, only do it when you don’t need the Note Taker any more.
- How to use it
Here is a step by step process for how to use the Note Taker:
- Start by turning on the Note Taking Mode
- Tap the Spacebar, the Note Taker becomes active:
- Optional: pick a group for the note
- Type your note and tap Enter
- The Note is added to the appropriate group!
And that’s all you need to do! After step 4, the Note Taker returns to its empty state and you can repeat the process by tapping Space again.
- How it picks users
When you hit Space to start a new note, the Note Taker looks for a likely owner in this order:
- Does someone have the green light in Random Order? Pick them
- Is someone in the Spotlight? Pick them
- Does someone have the green hand raise? Pick them
- Pick me
So during a Random Order round, most of the time whenever you hit space, the current active talker is going to be the owner it picks. It doesn’t change owners automatically while you’re typing a note, so it doesn’t matter if the order shifts before you’ve finished.
In most cases, you won’t even need to think about the owner.
Remember: You can always click the owner initials to manually select an owner instead.
- Send to Pad
The Note Takes also lets you send Notes directly to your Pad instead of adding them as Notes. In that case, you should click the Group selector in the Note Taker and choose Save to Pad.
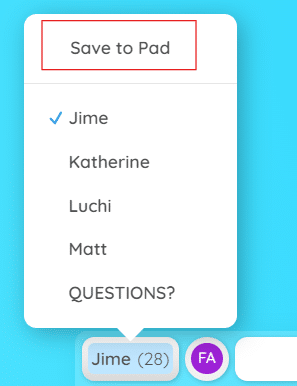
You’ll realize the Note Taker updates to show that the Pad will receive your notes. No Owner is assigned when you save notes to the Pad this way, but you can just hit Space, type a note, hit Enter, and a new line will be added to your pad.

- Secret shortcut
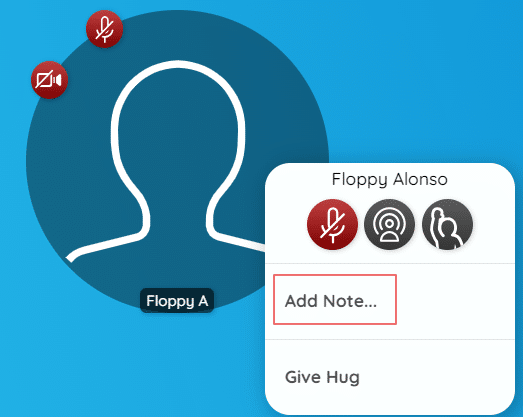
For the adventurous, there’s an even faster way to add a note for a user: just right-Click on the user’s video circle and you’ll see a new pop-up menu. In this menu you can see their full name, and selecting “Add Note” turns Note Taking Mode on and activates the Note Taker with the user you chose as the note owner!
Viewing Notes During the Session
During your session you might want to display the notes in a larger window for everyone to view. You can do this in a couple of ways:
During your session you might want to display the notes in a larger window for everyone to view. You can do this in a couple of ways:
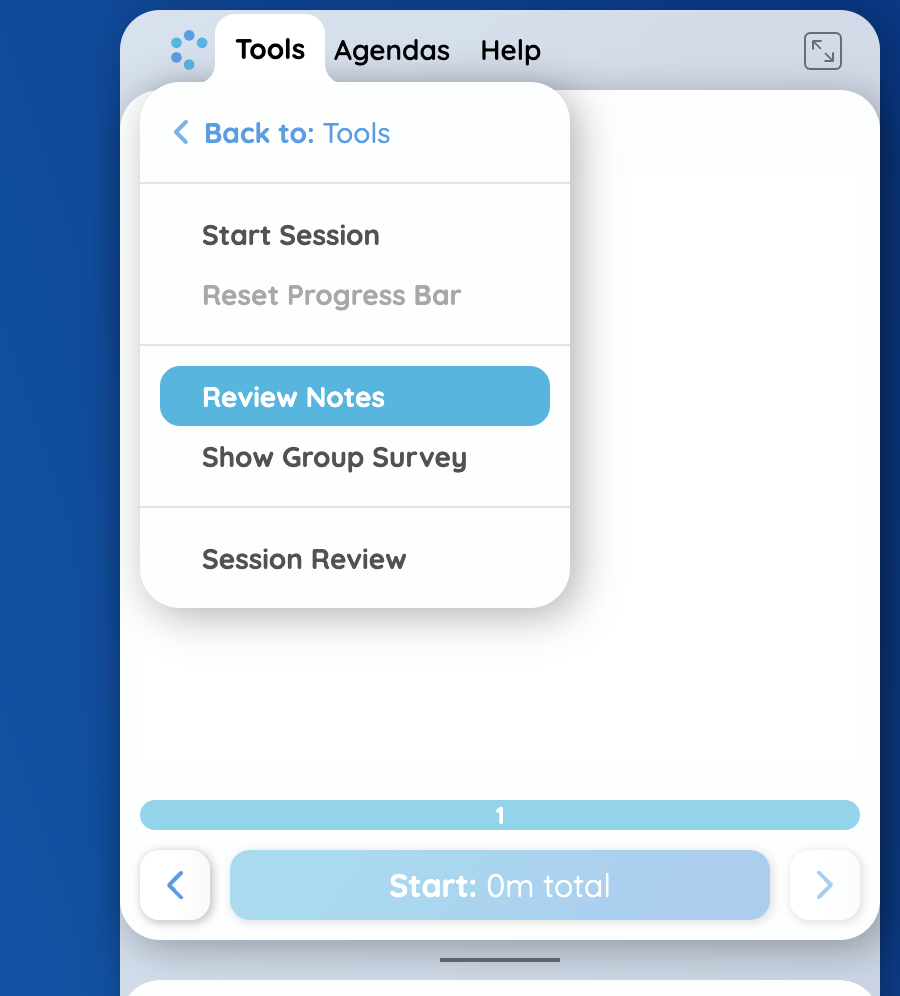
- Using ‘Review Notes’:
- Open the Tools menu in the top right of the CircleSpace™️ and select ‘Session Controls’.
- In the menu that opens choose the ‘Review Notes’ option.

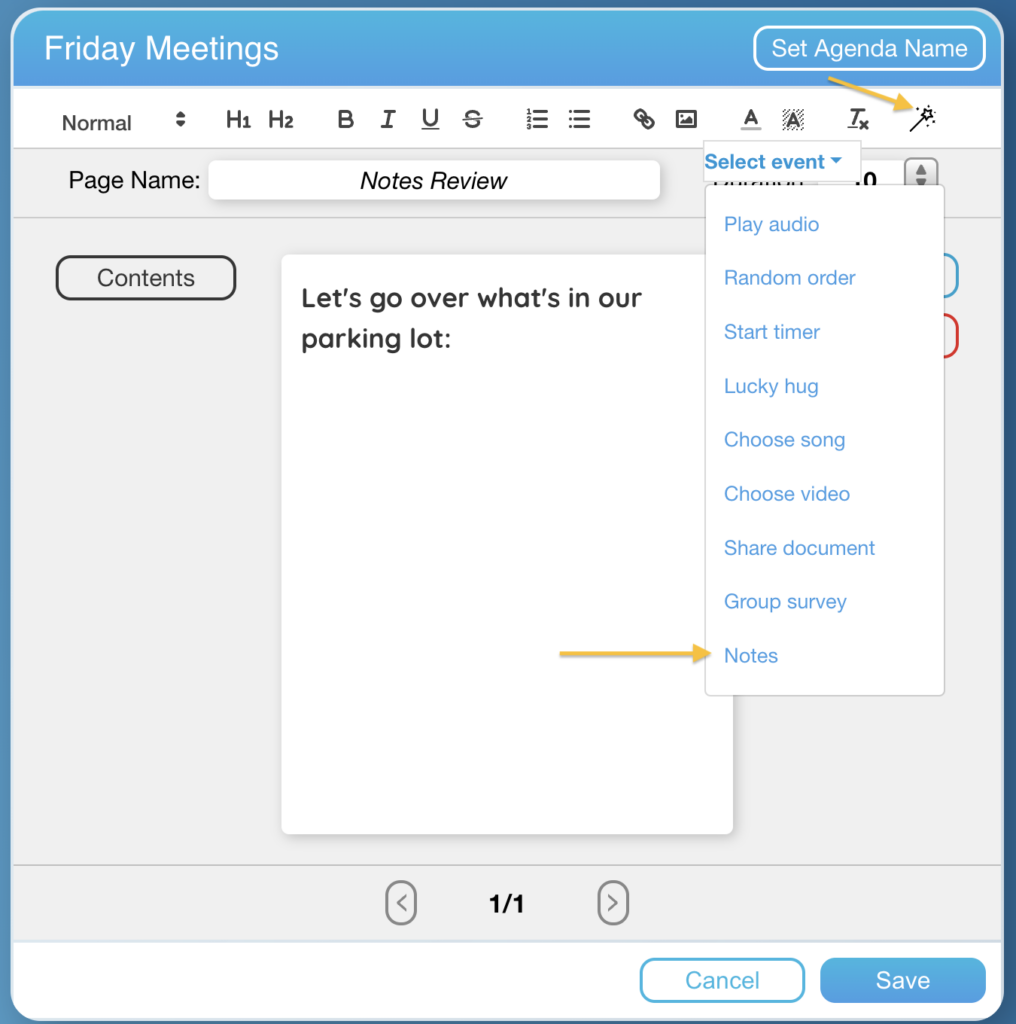
- Adding a button to your agenda:
- In the agenda editor, click the magic wand icon to open the list of agenda buttons.
- Select ‘Notes’ at the bottom of the list.
Notes will also appear when you open the End of Session Review panel. To learn more about this, check out this article.