How Can We Help?
How to Create, Launch and End Breakout Groups
One of our most exciting features is the ability to create breakout groups in the CircleSpace™️. This step-by-step guide will explain how to sort your participants from your main session into the subgroups you want and to send them on their way to the breakout circles.
Breakouts are created, launched, monitored and ended from the breakouts panel in the Tools menu of the CircleSpace™️. To open the breakouts panel, click on the Tools button at the top right of the room, above the agenda space, and select ‘Facilitator Tools’. Then select ‘Create Breakouts…’
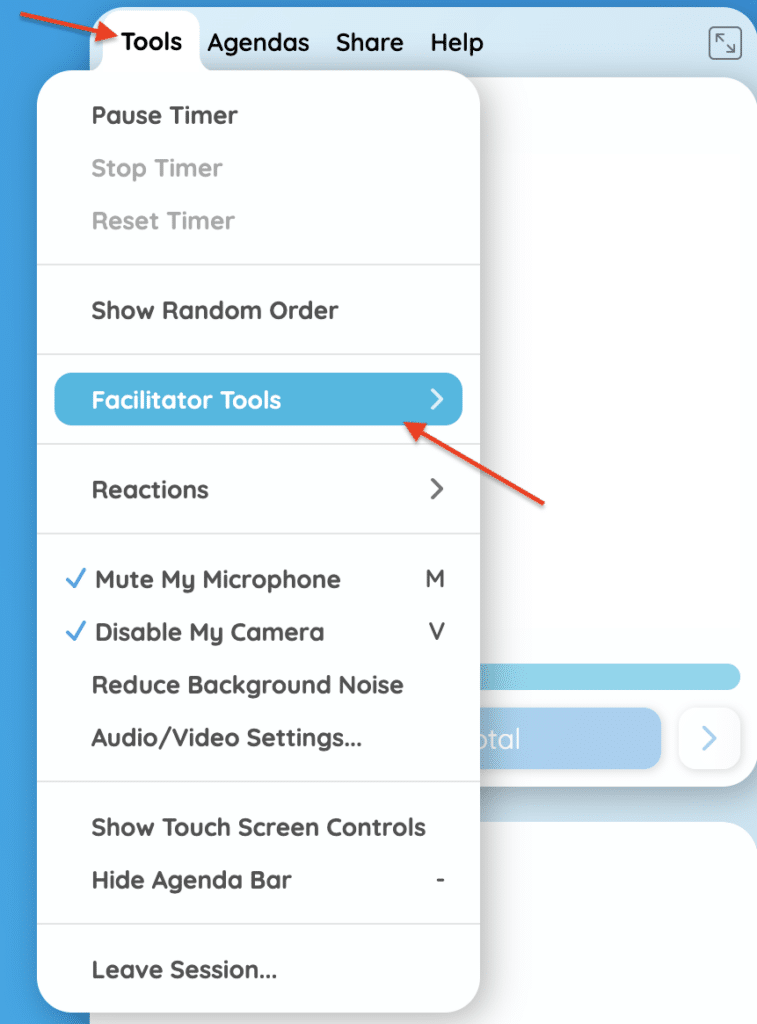
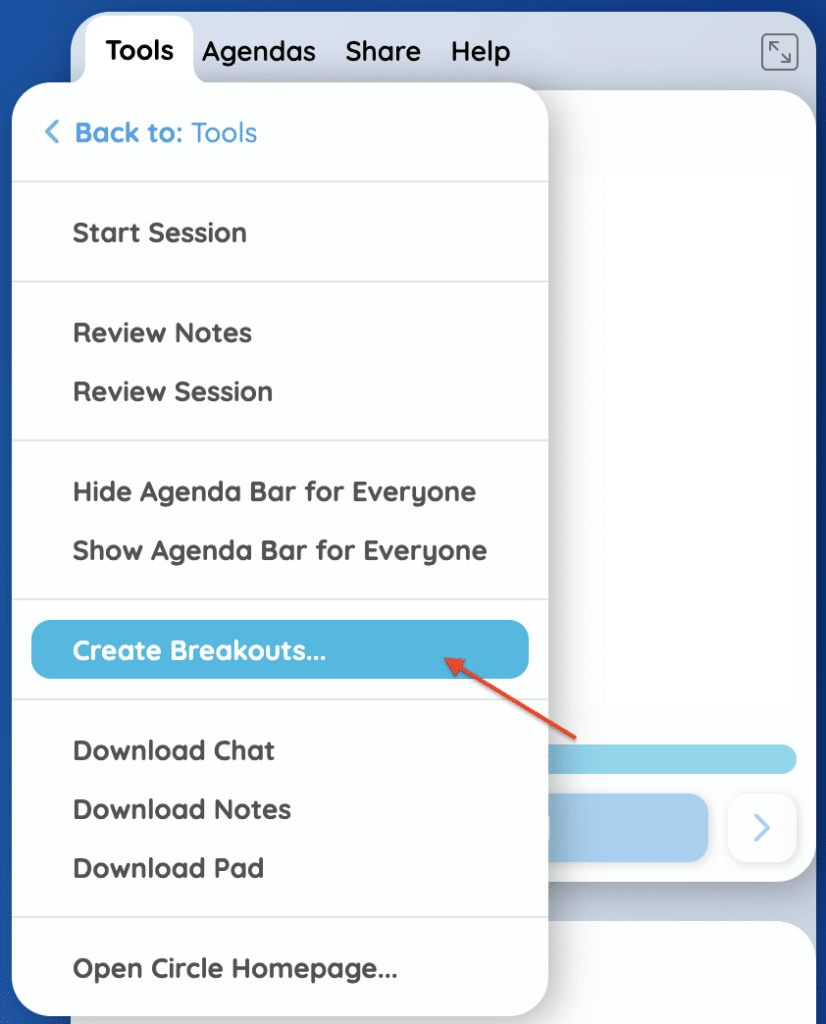
Now that you have the breakouts panel open, you can begin to sort your participants. You can do this by either automatically assigning them to breakout groups, or by intentionally assigning each participant to a particular group.
To place participants at random into groups, click the ‘Auto-Assign to Breakouts‘ button on the bottom left side of the panel. You will then be asked how many groups you wish to create, and whether you would like to include yourself in a breakout. The number of groups available to create depends on how many participants are in the room. You can even include Circle members, who are still absent (for example, when you know they will be arriving shortly). Upon arriving, they will be redirected to the breakout directly.
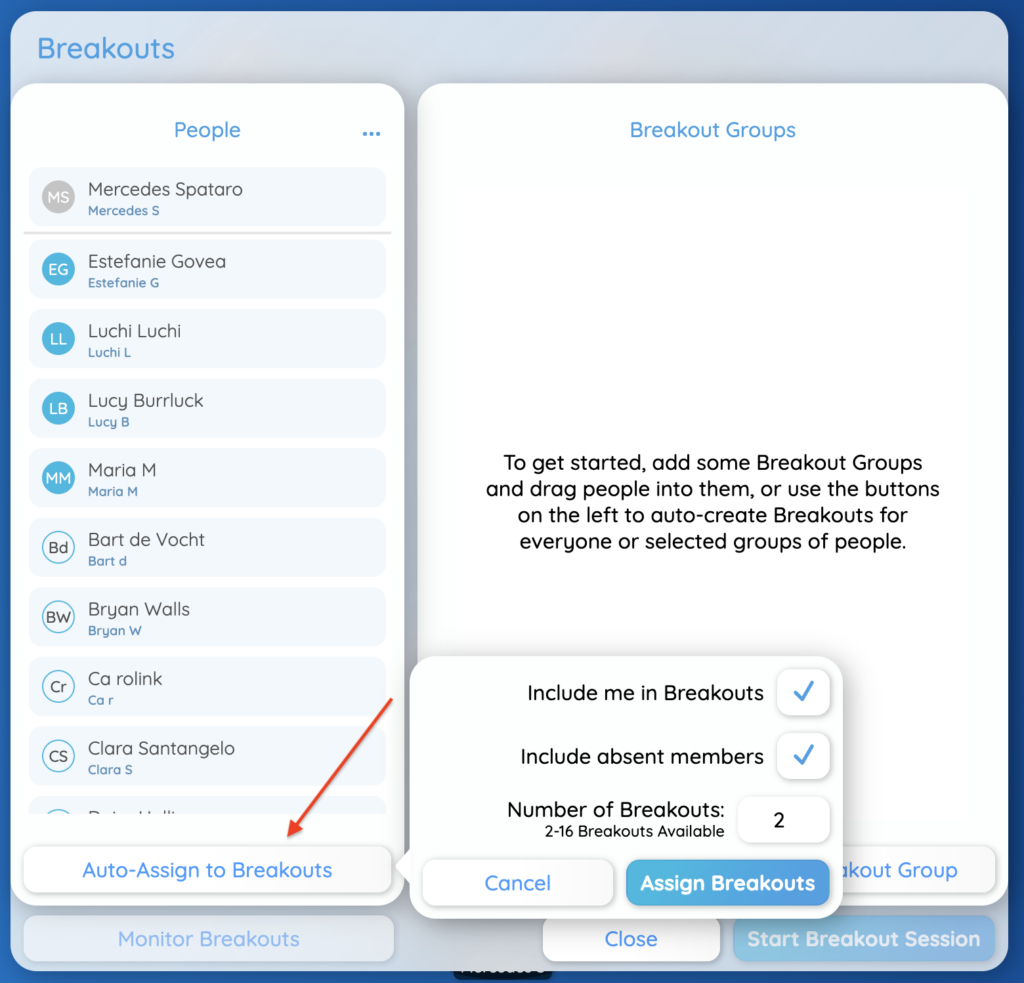
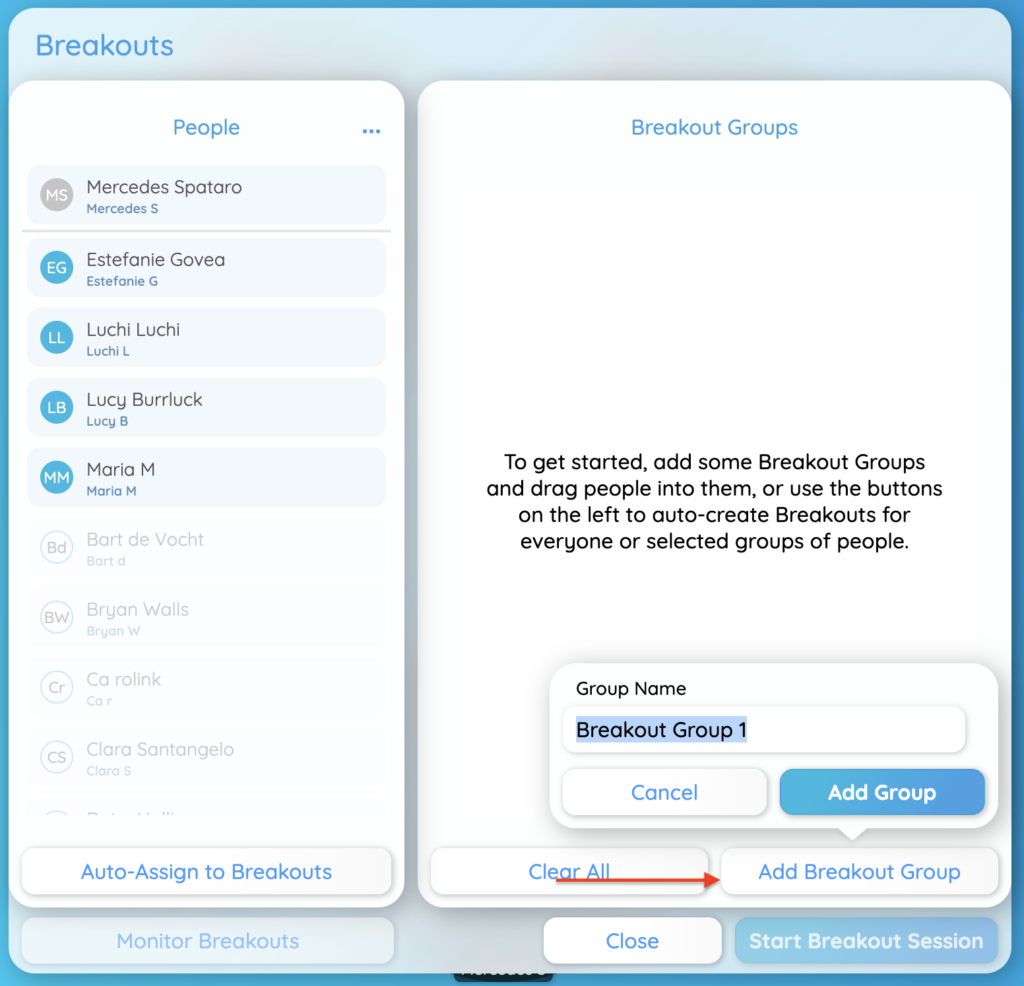
Your name will always appear first, then you will see the present members, whose initials are in blue circles, and below them the absent members, whose initials are in white circles (e.g. Bart de Vocht in the above image). If you prefer to see only the present members, you can hide absent members from the list by selecting the option “Hide Absent Members” in the three dots menu next to “People” on top (see image below).
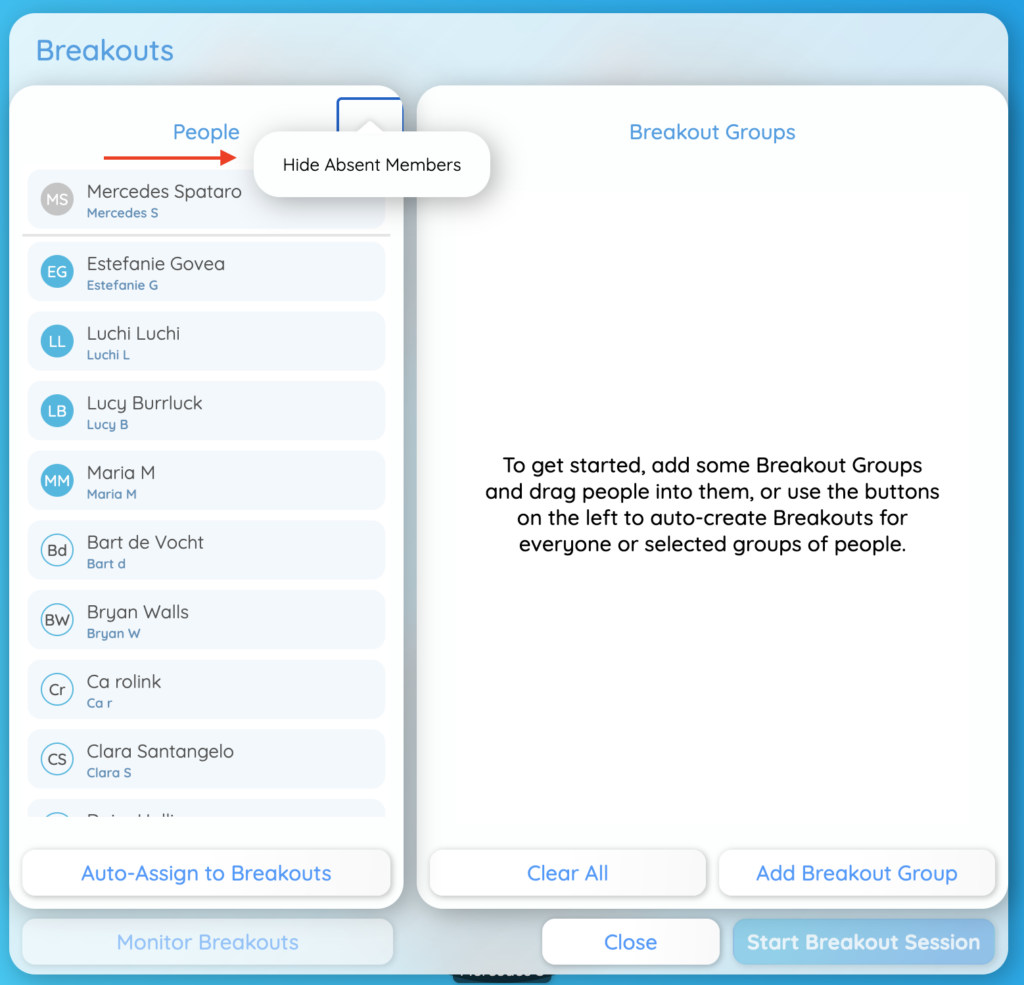
If you want to intentionally sort your participants, simply start dragging participants into the breakout group section, or create a group by clicking ‘Add Breakout Group‘ on the bottom right of the panel. With this second option, you’ll be asked to name the group, and from there all you have to do is click and drag the participants you want to place in each group.
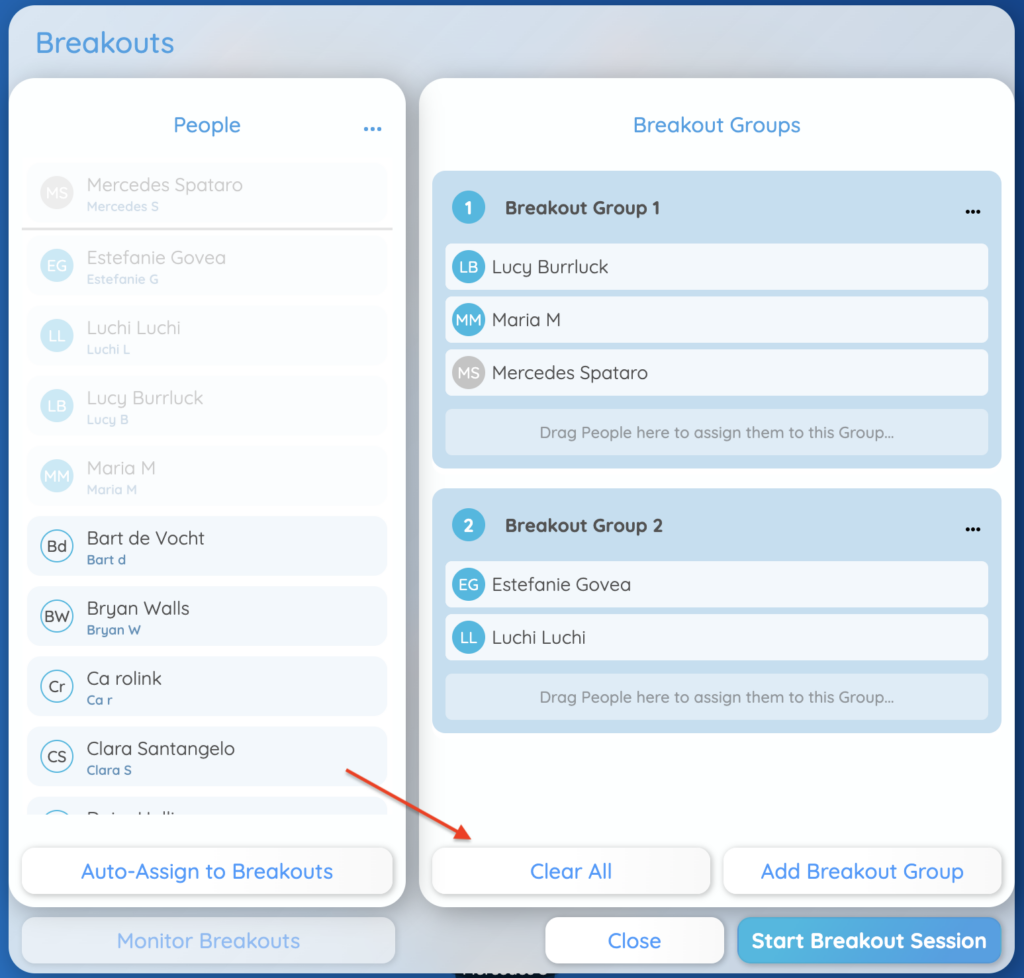
If you make a mistake or want to get rid of the groups you have already created, simply click the ‘Clear All‘ button at the bottom of the panel (see image below). You can also click and drag participants out of a group again in order to remove them from the group or to drag them to another group.
When you have created a breakout group, you may wish to edit it (renaming, clearing it of participants, or deleting it altogether). Click the three dots menu on the right of each group to do so.
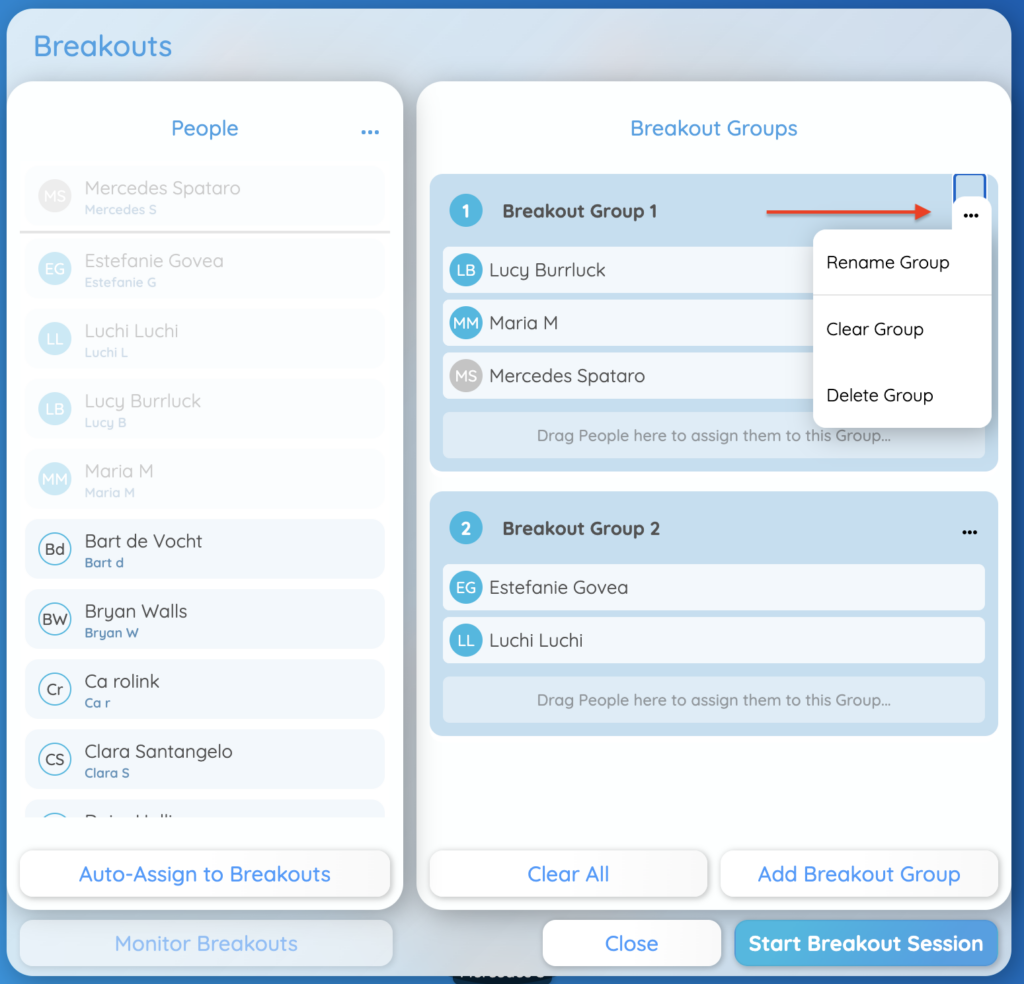
The ‘Rename Group‘ button will open the text editor where you can type in a different name for your group.
Clicking the ‘Clear Group’ button will remove all participants from that group and return them to the People list on the left.
Finally, you can delete a group entirely by clicking ‘Delete Group’.
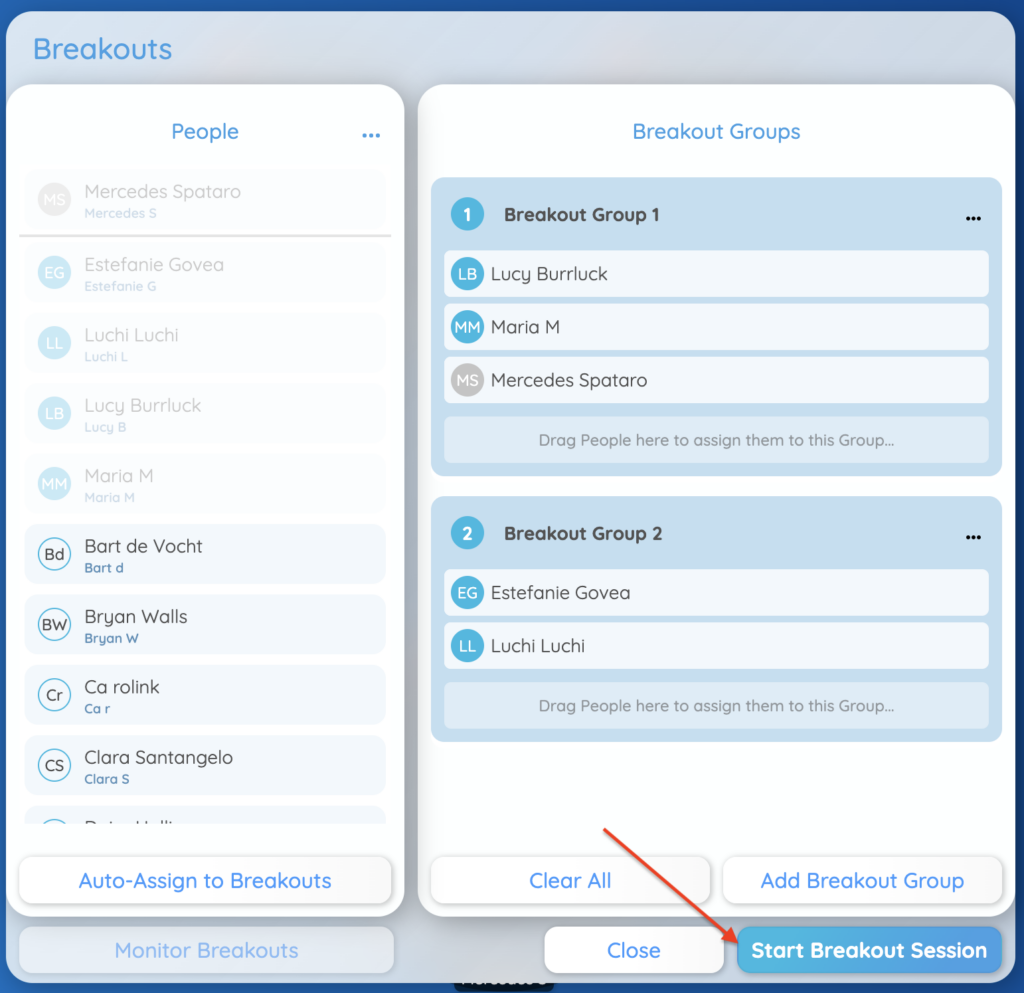
When you have completed filling the groups and are ready to launch the breakouts, all you need to do is click ‘Start Breakout Session‘. This will immediately send each participant to with the assigned group into a separate room.
To end your breakouts and call people back into the main group, click ‘End Breakout Session’. This will send a message to the participants in the breakouts to come back to the main room.
When in the breakout room, participants can click ‘Return to the Session’ when they are finished to come back to the main room.
Once you have sent people to breakouts, you can monitor them. Head over to How to Monitor Breakouts in Progress to learn more!