How Can We Help?
Quickstart Circles Organizer
In this article, we want to show you how to get started with Circles. Here are 4 easy steps for you:

The Circles platform can be used for many different settings. We want to make it as easy as possible for you.
- Get in touch with our support team via the support modal on the bottom right of your screen to let us know you’re interested and provide your email address.
- Within a brief period of time you will receive a personal email from one of our team members. According to what will likely work best for you, we will support you in getting onto the platform.
A circle is a group of people that has its own CircleSpace™️. Each of the members has a personal join link that works like a password into the interactive video space. Your members do not need anything besides their personal links to participate. Here is how you add members to your circle:
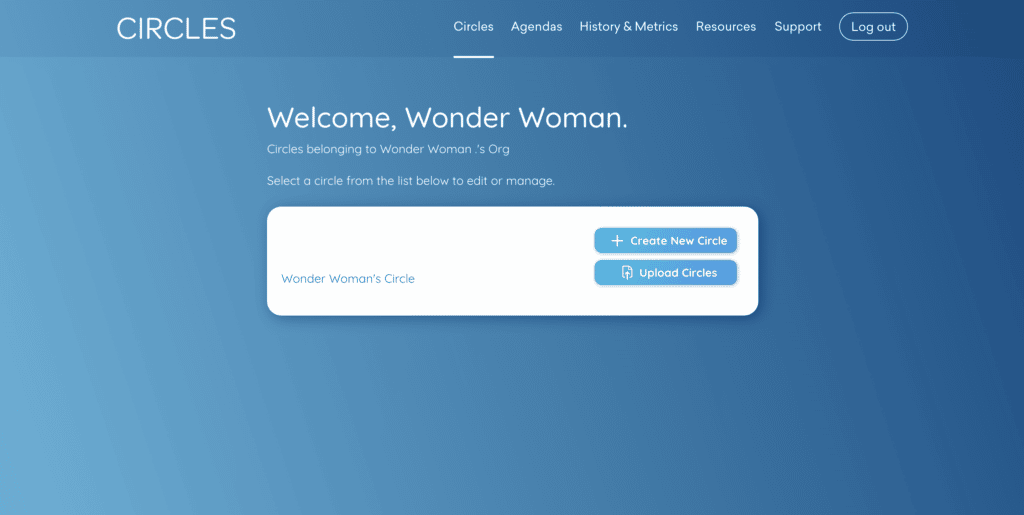
- Go to your My.Circles dashboard by clicking “Log into your Circles dashboard” or by logging in at my.circl.es.
- When you select “Circles” in the top menu, you can access your individual circles:
- Select “Add members.”
- Add the first name, last name and email address of the person you want to add.
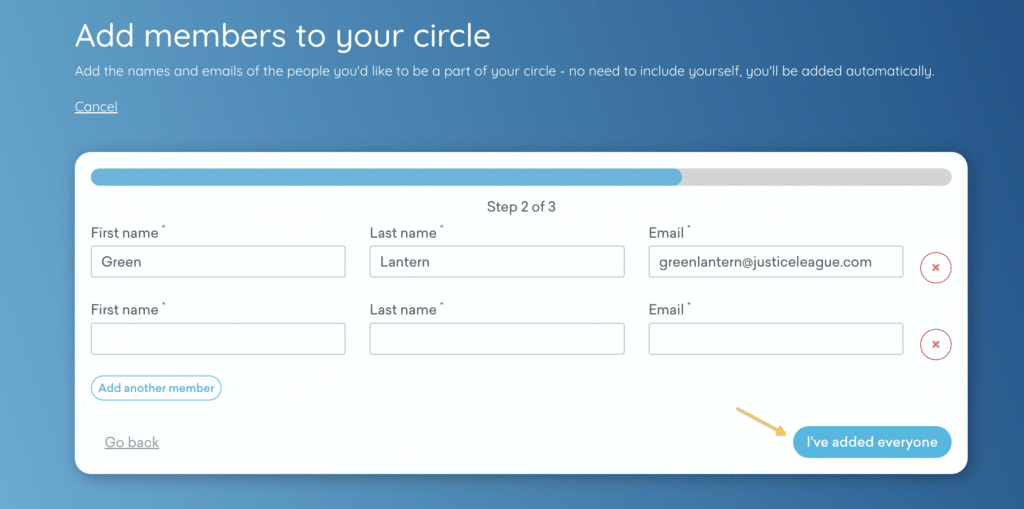
- Click “Add another person” to add multiple people at the same time. When done, click “Next” and then “Finish” on the following page.
- The new members now show up on your Circle overview.
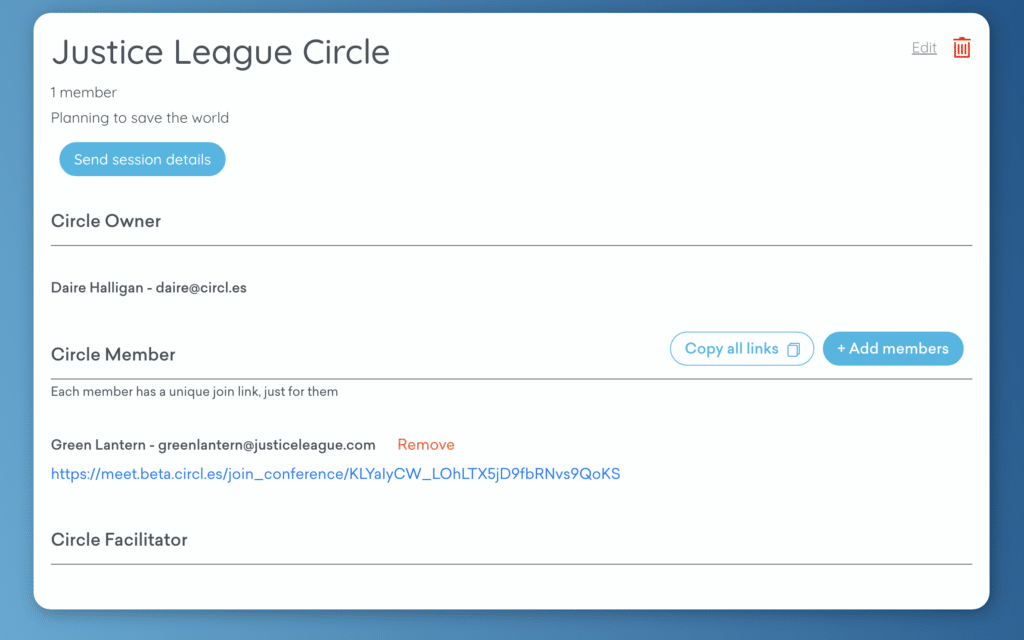
Only persons that you invited into your circle can come into your Circles space. Using their personal join link, they can come into the Circles space at any time, for example to quickly check in with each other between official sessions. The easiest way to let your members know about a session and their personal join link is to send them the session details straight from your My.Circles dashboard:
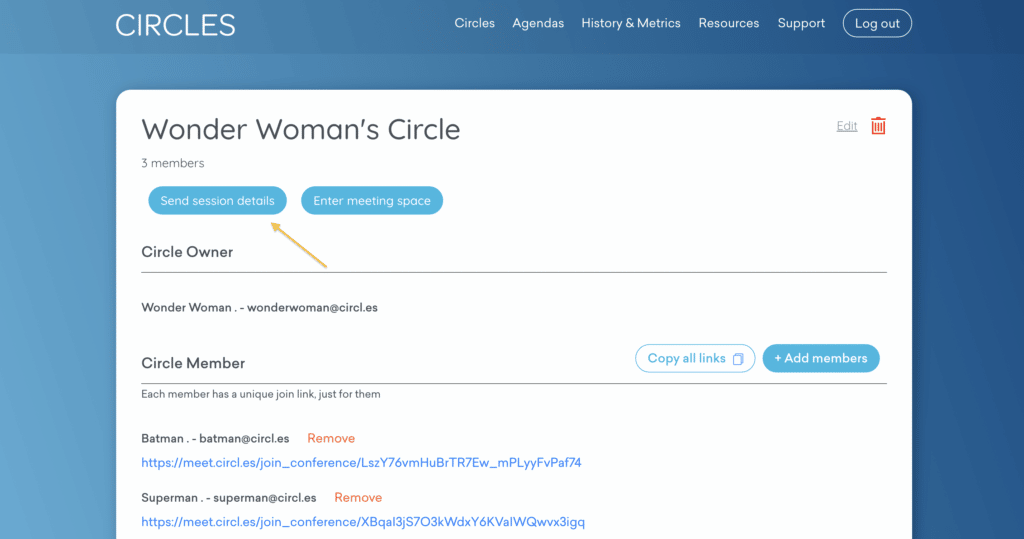
- Go to your My.Circles dashboard, by logging in at my.circl.es and navigate to your circle: Select Circles in the top menu and click on the circle for which you want to schedule a session.
- Select “Send session details” on top of your circle’s overview.
- In the window that opens, select the date, time and duration of your session. Then, add a message about its purpose.
- Select which of your members you want to invite by ticking or unticking the box next to their name.

- Click “Submit” to to send an email to your selected participants that includes the following information:
- Session details (date, time, and purpose)
- Individual link to join the session
- Tech best practices
- An ‘Add to calendar’ link
NOTE: Circles spaces must be accessed on a laptop or desktop – no mobile phones.
- Head to your My.Circles dashboard by clicking the “Go to your dashboard” button or by logging in at my.circl.es.
- Select “Enter meeting space” in your circle or open your personal join link.